| KIT #: | A060 |
| PRICE: | $56.15 |
| DECALS: | Three options |
| REVIEWER: | Bill Koppos |
| NOTES: | Unexpected Subject |
| HISTORY |
 were
tried throughout the Bloch's career, but the problem was never completely
eradicated. Production began with the designation MB151, output initially
being very low. The MB151 was still too slow and further modifications to
engine, wings and cowl resulted in the MB152, which could finally carry the
2-cannon and machine gun armament that was it's best strong point. When
airframe production at last picked up, many were grounded for lack of
propellers! There seemed no end to the problems of the French aircraft
industry.
were
tried throughout the Bloch's career, but the problem was never completely
eradicated. Production began with the designation MB151, output initially
being very low. The MB151 was still too slow and further modifications to
engine, wings and cowl resulted in the MB152, which could finally carry the
2-cannon and machine gun armament that was it's best strong point. When
airframe production at last picked up, many were grounded for lack of
propellers! There seemed no end to the problems of the French aircraft
industry. | THE KIT |
| CONSTRUCTION |
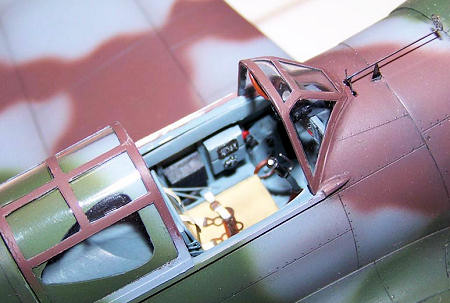 First let me say my references were limited on this aircraft, so I figured
this one would be a good choice for keeping simple, being done mainly Out of
Box. The one pic I did find showed the cockpit/seat setup to be pretty
accurate, and looked busy enough when painted up. The seat has etched braces
that help it, and I used Humbrol buff, dirtied with pastels, to simulate the
canvas seat and seat back. The instrument panel had nicely raised detail to
paint, and before you know it the fuselage was together. The "scallop"
windows on the fuselage spine are molded as a clear part of the fuselage
spine, a nice touch. I added strips to represent the canopy slide rails as
per photos, these running between the small teardrop-shaped fairings the kit
provides. So far so good. This happy scene would soon change.
First let me say my references were limited on this aircraft, so I figured
this one would be a good choice for keeping simple, being done mainly Out of
Box. The one pic I did find showed the cockpit/seat setup to be pretty
accurate, and looked busy enough when painted up. The seat has etched braces
that help it, and I used Humbrol buff, dirtied with pastels, to simulate the
canvas seat and seat back. The instrument panel had nicely raised detail to
paint, and before you know it the fuselage was together. The "scallop"
windows on the fuselage spine are molded as a clear part of the fuselage
spine, a nice touch. I added strips to represent the canopy slide rails as
per photos, these running between the small teardrop-shaped fairings the kit
provides. So far so good. This happy scene would soon change. 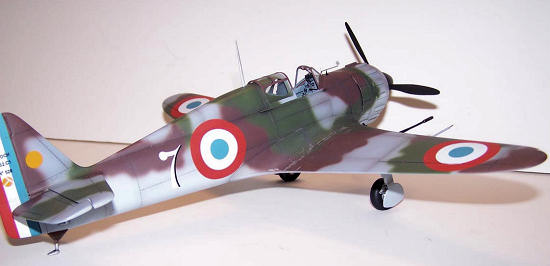 root,
reinforce with styrene strips, let dry completely, then glue the bottom wing
to the top. After this dried, I was able to pull down the assembled left
wing, glue the central bottom and right top wing on. The right top did not
now match the bottom very well, and the panel lines do not match up, but
there was nothing to be done about it. The left wing also has a permanent
twist downward to the trailing edge that is noticeable if stared at.
Hopefully for you folks this warp was peculiar to my sample, but it's
something to be aware of.
root,
reinforce with styrene strips, let dry completely, then glue the bottom wing
to the top. After this dried, I was able to pull down the assembled left
wing, glue the central bottom and right top wing on. The right top did not
now match the bottom very well, and the panel lines do not match up, but
there was nothing to be done about it. The left wing also has a permanent
twist downward to the trailing edge that is noticeable if stared at.
Hopefully for you folks this warp was peculiar to my sample, but it's
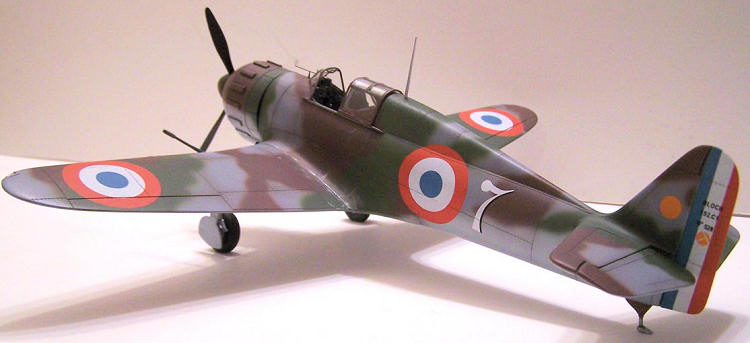
something to be aware of. | COLORS & MARKINGS |
 enamels
all the way, my local shop having most of the French colors necessary.
These were French Dark Blue grey, French Light Blue Grey for the unders,
French Chestnut (Brown) and I cheated by using RAF Dark green as a
substitute for the proper French color. The under color was applied first,
then I freehanded the rest working from lightest to darkest. The results
pleased me, the French greys being particularly pleasing to the eye. I then
post shaded the panel lines on bottom with a dark grey mix, and on top with
a grey/Umber mix, liking much how this turned out. Shooting it all with
Metallizer Sealer as a glosscoat, decaling could begin 20 minutes later.
enamels
all the way, my local shop having most of the French colors necessary.
These were French Dark Blue grey, French Light Blue Grey for the unders,
French Chestnut (Brown) and I cheated by using RAF Dark green as a
substitute for the proper French color. The under color was applied first,
then I freehanded the rest working from lightest to darkest. The results
pleased me, the French greys being particularly pleasing to the eye. I then
post shaded the panel lines on bottom with a dark grey mix, and on top with
a grey/Umber mix, liking much how this turned out. Shooting it all with
Metallizer Sealer as a glosscoat, decaling could begin 20 minutes later.| FINAL CONSTRUCTION |
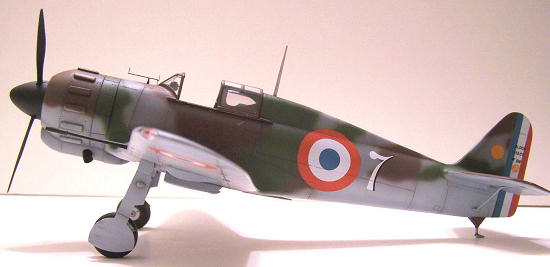
 latter-day
SPAD13. Were they saving Francs or weight or what? A tailskid on a machine
likely to be flown from muddy grass fields seems backward to me.
latter-day
SPAD13. Were they saving Francs or weight or what? A tailskid on a machine
likely to be flown from muddy grass fields seems backward to me. | CONCLUSIONS |
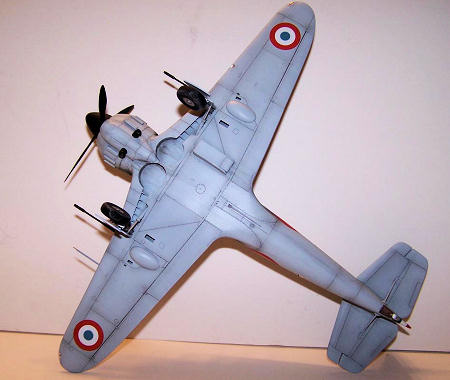 I was very happy with my French fighter. I never thought of this machine as
a looker, but it grew on me. The forward-placed cockpit, neat gunsights,
and cowling/spinner combo lend it a purposeful appearance. I can say now I
am a confirmed Blochhead. The camo colors make me want to do another Armee
d'el Air subject, maybe a Morane 406, perhaps. I can't say this one was easy
due to the wing problems, but there is always something of this kind on
limited-run models. This one is definitely do-able by those with experience
in this type of kit. Maybe yours won't have the warpage problem.
I was very happy with my French fighter. I never thought of this machine as
a looker, but it grew on me. The forward-placed cockpit, neat gunsights,
and cowling/spinner combo lend it a purposeful appearance. I can say now I
am a confirmed Blochhead. The camo colors make me want to do another Armee
d'el Air subject, maybe a Morane 406, perhaps. I can't say this one was easy
due to the wing problems, but there is always something of this kind on
limited-run models. This one is definitely do-able by those with experience
in this type of kit. Maybe yours won't have the warpage problem.| REFERENCES |
Bill
Koppos December 2008 Copyright ModelingMadness.com. All rights reserved. No reproduction in part or in whole without express permission from the editor. If you would like your product reviewed fairly and quickly, please
contact
the editor or see other details in the
Note to
Contributors.