Airfix 1/48 P-51D Mustang
| KIT #: | A05131 |
| PRICE: | $29.95 |
| DECALS: | Two options |
| REVIEWER: | Tom Cleaver |
| NOTES: |
| HISTORY |
The 325th Fighter Group arrived in North Africa when they flew off USS Ranger in late November 1942. The group participated in the fighting in Tunisia, then took part in the invasion of Sicily and moved to Italy following the invasion in September 1943. During this time, they adopted as the group marking a yellow-and-black checkerboard on the tail surfaces and became known as “The Checkertail Clan.”
 In November 1943
the group was tranferred to the newly-formed 15th Air Force and equipped with
the P-47D Thunderbolt, which they used for escort missions until March 1944 when
they were re-equipped with the P-51B Mustang. Flying the Mustang, the group gave
escort to B-17s and B-24s when the oil campaign began in April 1944 with
missions flown against the Romanian oil fields at Ploesti. In massive air
battles in April, May and June, the fighter groups of the 15th Air Force
established air superiority over Romania by the time Romania left the Axis that
August. During this time the 325th FG took part in two shuttle raids to the
USSR.
In November 1943
the group was tranferred to the newly-formed 15th Air Force and equipped with
the P-47D Thunderbolt, which they used for escort missions until March 1944 when
they were re-equipped with the P-51B Mustang. Flying the Mustang, the group gave
escort to B-17s and B-24s when the oil campaign began in April 1944 with
missions flown against the Romanian oil fields at Ploesti. In massive air
battles in April, May and June, the fighter groups of the 15th Air Force
established air superiority over Romania by the time Romania left the Axis that
August. During this time the 325th FG took part in two shuttle raids to the
USSR.
The P-51Bs were replaced with P-51Ds in July 1944. Following the success of the oil campaign, the 15th Air Force concentrated their missions against targets in ustria, Hungary and southern Germany for the remainder of the war.
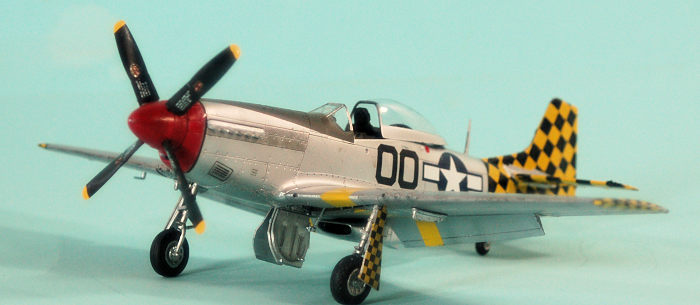
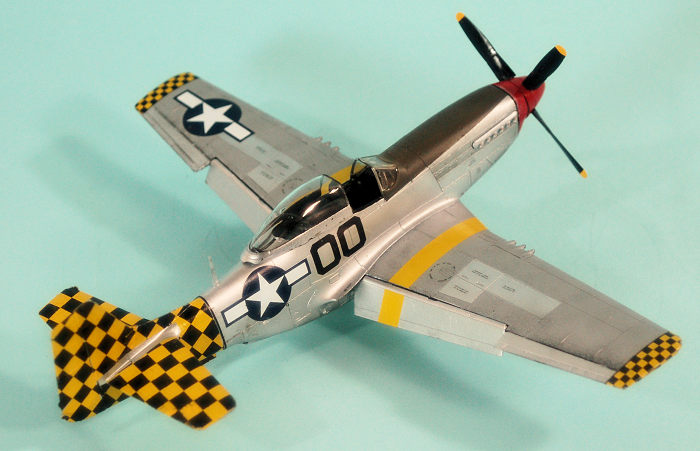
In January 1945, the group markings were expanded to cover the entire rear fuselage and tail surfaces of the P-51Ds, with the result that the “checkertail Clan” became the most colorfully-marked fighter group in the USAAF during the final months of the war.
| THE KIT |
When Airfix announced in 2015 that they would produce a new 1/48 P-51D Mustang, the event was met with yawns. “Another P-51?”
 It’s true, there
are a lot of them out there. As Airfix released the CAD mockups, people began to
take note, since the designers were catching things about the airplane other
kits had ignored.
It’s true, there
are a lot of them out there. As Airfix released the CAD mockups, people began to
take note, since the designers were catching things about the airplane other
kits had ignored.
The end result in the box is a kit with early and late “bubble” canopies, and an accurately-shaped “Dallas” canopy; a choice of ventilation holes or louvres for the forward cowling; flaps that have no “ledge” when deployed (and the design is such one cannot get the wrong angle); landing gear designed to self-position at the correct angle (no more dangling main gear); a front windscreen that is a one-piece design with the fuselage, so there are no more gaps; correct main gear well with the main spar backing the whole thing; correct “early” and “late” dorsal fin options; all control surfaces are posable.
Cartograf decals for Donald Strait’s 351st FG ‘Jersey Jerk” and a 1st Air Commando Mustang are included.
So, is it indeed “a better mousetrap”? Read on.
| CONSTRUCTION |
Taking my time, and fitting parts carefully (not to mention following the instructions) I had the kit assembled in five hours, with no filler anywhere. Parts fit is precise. Be sure you trim off all little “sprue nubs.” The instructions are clear and easy to follow.
I prepainted the cockpit parts Dull Dark Green, with flat black for the fuel tank and the non-skid on the cockpit floor. Once assembled, the cockpit provides sufficient detail that when installed, I don’t think you’re really going to want to invest in a resin cockpit. I elected to do the model OOB (other than markings and decals), and painted the molded-on seat belts.
 The wing is easily
constructed, and it is nice to see that the main gear well - for the first time
in any 1/48 Mustang kit - uses the main spar as the rear wall of the well
throughout.
The wing is easily
constructed, and it is nice to see that the main gear well - for the first time
in any 1/48 Mustang kit - uses the main spar as the rear wall of the well
throughout.
By providing two sets of flaps - one for “up, one for “down,” Airfix is able to offer flaps that in the “down” position do not have the “ledge” so familiar with the Tamiya kit. They have tabs that insure they’re in the full-down position when installed.
Everyone normally has fits over getting the main gear legs positioned at the proper angle; failure to get it right is the major “fail” in Mustang models, even those built by “experts.” Airfix has designed this gear so that one sticks it in the hole and it is positioned at the right angle. No more hemming and hawing.
As with most
injection-molded canopies, getting the canopy on this kit to sit properly in the
open position is difficult due to the thickness of the part. The solution is
easy: I scraped down the interior of the lower canopy frame from a point about
1/8-inch from the front, so that it was “knife-edge” thin. I
 then clipped the
bottoms off either end of the canopy brace and attached it. With this, the
canopy will easily “sit right” (i.e., on top of the fuselage not above it), and
the flattened tips of the brace make a good attachment point.
then clipped the
bottoms off either end of the canopy brace and attached it. With this, the
canopy will easily “sit right” (i.e., on top of the fuselage not above it), and
the flattened tips of the brace make a good attachment point.
Since I was doing a P-51D-10, I used the “early” dorsal fin. If you cannot distinguish the two, the early fin has a constantly-curved upper line in profile. You can also distinguish these parts by the fact the instructions call for you to use the other parts for the “late” dorsal fin.
The wing and fuselage assemblies came together with a satisfying “click” and there was no need for filler anywhere.
| COLORS & MARKINGS |
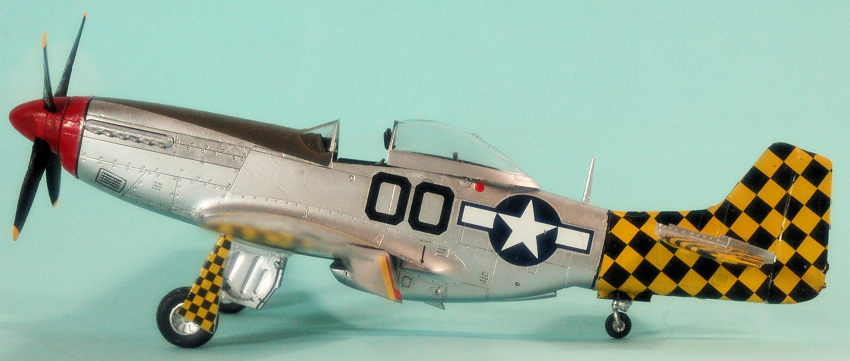
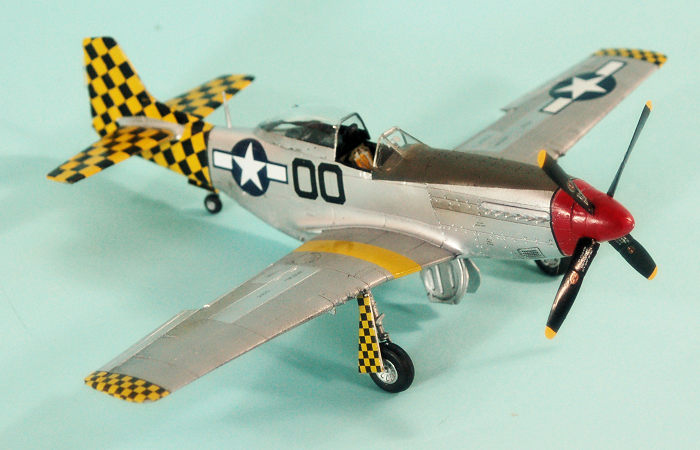
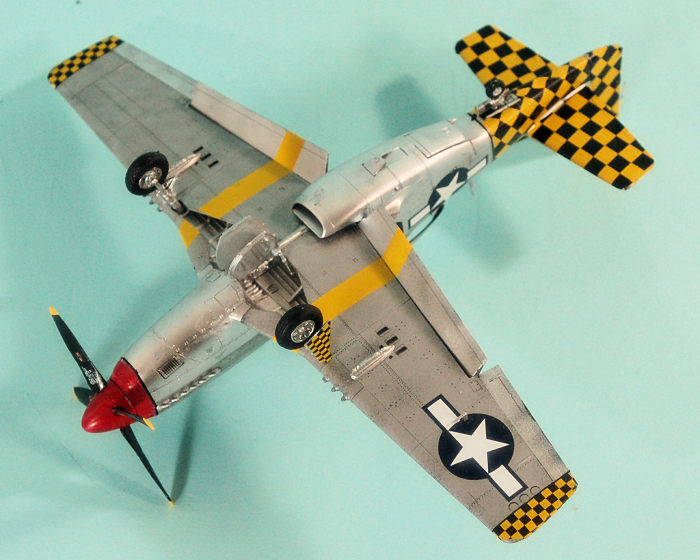
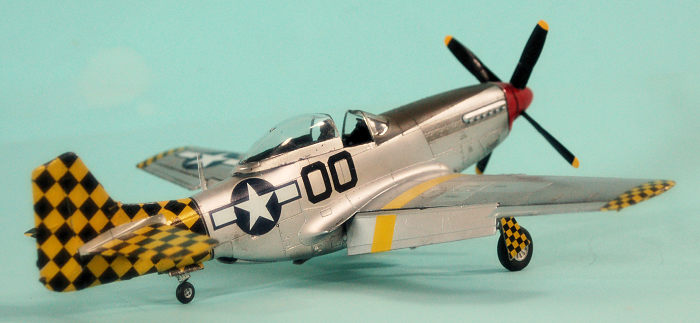
I painted the entire model with Tamiya Gloss Black. I then painted the wings with Vallejo “Dull Aluminum” to simulate the aluminum lacquer they were painted. The gun bay covers, ailerons and flaps were painted “white Aluminum,” while the fuselage was painted “Duraluminum” with “Dark Aluminum” around the exhausts.
 I used the old
Aeromaster sheet “Checkertail Clan” to do Group Commander William Beverly’s
“00". The Aeromaster checkertail decals included both colors. These were
originally fitted for the Hasegawa P-51D, which is slightly different
dimensionally than the Airfix kit. Fitting the fuselage and vertical fin decals
involved a bit of “fiddling” to get them correctly aligned. The rest of the
markings were also from the Aeromaster sheet, including the yellow wing stripes.
I used the old
Aeromaster sheet “Checkertail Clan” to do Group Commander William Beverly’s
“00". The Aeromaster checkertail decals included both colors. These were
originally fitted for the Hasegawa P-51D, which is slightly different
dimensionally than the Airfix kit. Fitting the fuselage and vertical fin decals
involved a bit of “fiddling” to get them correctly aligned. The rest of the
markings were also from the Aeromaster sheet, including the yellow wing stripes.
I unmasked the canopy and glued it in position, then assembled the main gear and attached each in position. The attachment is positive and there is no problem getting the correct angle for the gear legs. I then attached the exhaust stacks and prop and called it done.
| CONCLUSIONS |
The. Best. 1/48. P-51D. Available. Other modelers have claimed the Meng kit is equally good if not better. It is also twice as expensive for this kit. For the price, this Airfix kit represents excellent value for money (In the US, it is cheaper than the Tamiya kit by a good $5). In terms of what you get for the price you pay, this kit is hard to beat by anyone. Yes, Eduard’s doing one next year they claim will be “definitive”, but for the price they’ll charge, you’ll be able to get three of these.
The kit is designed for easy construction. Any modeler from a beginner with a couple kits completed to someone like me who’s been doing P-51s for mumblemumble years can follow the instructions in assembling this kit, secure in the knowledge they will have an excellent result.
This Mustang is Airfix’s best kit to date. It could be the “license to print money” they hoped the early P-40 would be.
Buy In Confidence.
18 January 2018
Copyright ModelingMadness.com.
Review kit courtesy of Hornby US
If you would like your product reviewed fairly and fairly quickly, please contact the editor or see other details in the Note to Contributors.
Back to the Main Page Back to the Review Index Page Back to the Previews Index Page