| KIT #: | RMA 3206 |
| PRICE: | $179.9 |
| DECALS: | Three options |
| REVIEWER: | Tom Cleaver |
| NOTES: | Resin kit |
| HISTORY |
Of the many types of warplanes used by the Soviet Air Forces during the
Second World War, the most celebrated, successful and widely-used were the
series of fighters by the design bureau led by Alexander Sergei Yakovlev. Though
they lacked the refinements found in British, German or American fighters, they
nevertheless commanded the respect of their enemies.
Design of what became the Yak-1 commenced in 1938 in response to an
official requirement for the development of a new sing-seat fighter as the
result of a design competition, as the Soviets belatedly began updating their
military equipment in the shadow of German aggression.
The then-little-known Alexander Yakovlev entered the competition with the
I-26, which was adjudged the most promising of those submitted. The prototype
I-26 was built of wood, and powered by the M-105, a license-built
 version of the
Hispano-Suiza 12Y, and first flew in March, 1939.
The aircraft received the designation Yak-1 shortly thereafter and work
began on a pre-production batch of fighters for further development.
Most of the defects testing discovered had been rectified by early 1941
and was cleared for mass production in June 1941.
, The development of the Yak-1 was so successful that it earned Yakovlev
the 100,000-ruble Lenin Prize and a Zis automobile on
version of the
Hispano-Suiza 12Y, and first flew in March, 1939.
The aircraft received the designation Yak-1 shortly thereafter and work
began on a pre-production batch of fighters for further development.
Most of the defects testing discovered had been rectified by early 1941
and was cleared for mass production in June 1941.
, The development of the Yak-1 was so successful that it earned Yakovlev
the 100,000-ruble Lenin Prize and a Zis automobile on
Due to the German attack and the need to remove the factory from Moscow
to the Urals in the fall of 1941, appreciable numbers of Yak-1s did not begin to
reach operational units of the V-VS in worthwhile numbers until the Spring of
1942.
The Yak-1b, powered by the M-105PF engine producing 1,200 h.p. and
distinguishable by a cut-down rear fuselage and all-round vision canopy, began
production in late 1942. The Yak-1b was for many years known in the West as the
Yak-1M. It is now known that the Yak-1M designation was given to only two
airplanes, the prototypes of what became the Yak-3 series.
The twin Beresin
Simple to build in quantity, rugged, and possessing superlative flying characteristics, the Yak fighters were superior to anything else at low to medium altitudes. The series was built in larger numbers than all other Soviet fighters used during the war combined, with a total production in excess of 30,000 between 1941 and 1945. Due to the inadequately power of the M-105 series of engines, which left much to be desired in terms of altitude performance, the Yaks were lightly armed by either German or Allied standards.
| THE KIT |
 This Yak-1b is the sixth all-resin kit produced by Montex, and furthers
the company’s reputation for excellence in design and production of an all-resin
kit. In fact, these resin kits are
serious competition to those released by Fisher Models for design and production
quality.
This Yak-1b is the sixth all-resin kit produced by Montex, and furthers
the company’s reputation for excellence in design and production of an all-resin
kit. In fact, these resin kits are
serious competition to those released by Fisher Models for design and production
quality.
The kit has separate control surfaces including flaps, and the overall
design is such that it is nearly a “snap-tite” kit, with fit tolerances so close
that only minimal effort will be needed to deal with seams.
The fit of the inner lower wing to the upper wing part is particularly
remarkable.
As with the other kits, a very fully-detailed cockpit is provided.
The three-part clear resin canopy is also very remarkable for its
crispness and clarity.
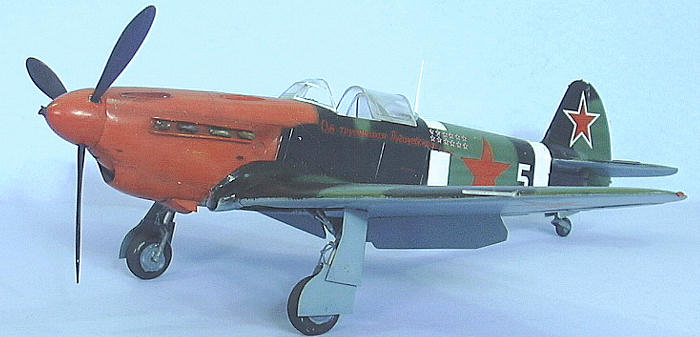
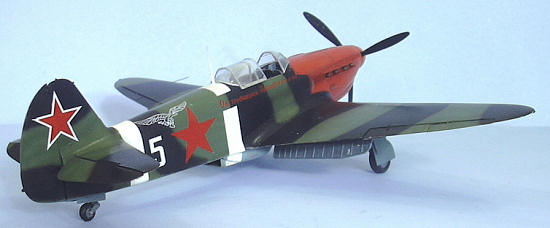
Decals are provided for three different aircraft, two of which are in the green-black-light blue camouflage, one with the nose in red, while the third is in the dark grey-green/light grey/light blue later style of camouflage.
| CONSTRUCTION |
As it turned out, the kit is not quite a “snap-tite” when it comes to
putting the glue to the parts and assembling them, but the kit is overall one of
the best-designed and easy to build resin kits available.
I would comp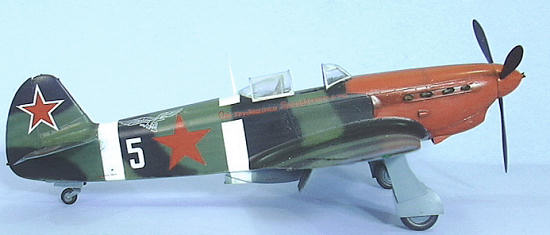 are it quite favorably with anything from Fisher Models for
design and production quality.
are it quite favorably with anything from Fisher Models for
design and production quality.
I started by painting all the detail parts.
The instructions say “light blue” and I used Xtracrylix “PRU Blue,” which
to me seems close to the blue used in Soviet aircraft.
I then proceeded to detail paint all the various parts in accordance with
the very detailed instructions. In
the process, I discovered that Xtracrylix “Braunviolett RLM81" is also a very
good color for leather.
I then proceeded to assemble the wings.
It was at this point I discovered I would have to fill the seams.
They’re very light, and I did it with cyanoacrylate glue.
As it turned out, I had to do that with all the seams.
The cockpit assembles easily.
I added an Eduard photoetch Sutton Harness, which really improves the
overall look. Once this was done,
the fuselage was assembled, after which I attached the wings, horizontal
stabilizers, and radiator housings.
Once I had sanded the seams smooth after applying cyanoacrylate, I gave all
those seams a coat of Tamiya “Mr. Surfacer substitute” and then sanded things
smooth again. I finished off by
rescribing panel lines where necessary.
| COLORS & MARKINGS |
Painting:
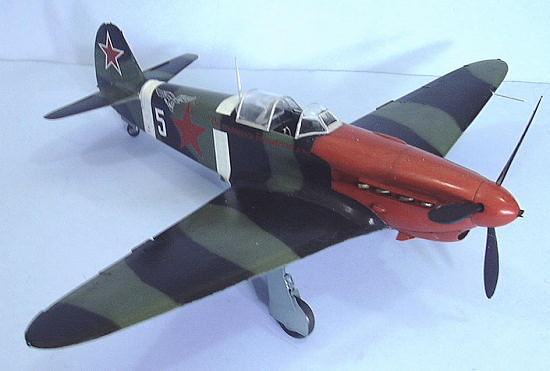
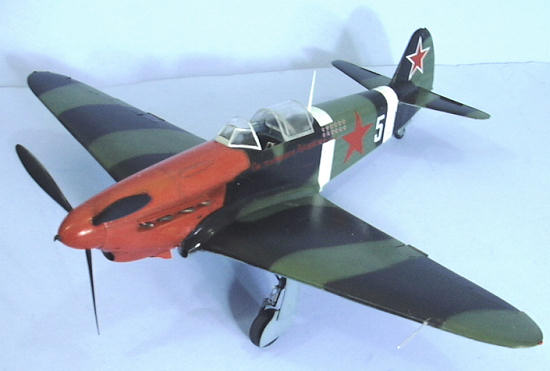 I had decided I wanted to do the red-nosed option.
After applying flat black over all the panel lines, I painted the nose
with Gunze “Rot RLM23". I then went
over that with thinned Tamiya Flat Red to intensify the color while ending with
a result that appears faded and worn.
I used Tamiya Flat White for the stripes.
When these areas were dry, they were masked off for application of the
camouflage.
I had decided I wanted to do the red-nosed option.
After applying flat black over all the panel lines, I painted the nose
with Gunze “Rot RLM23". I then went
over that with thinned Tamiya Flat Red to intensify the color while ending with
a result that appears faded and worn.
I used Tamiya Flat White for the stripes.
When these areas were dry, they were masked off for application of the
camouflage.
The camouflage paints used were a mixture of Xtracrylix “Hellblau RLM65"
and “Azure Blue” for the lower surface color, and Xtracrylix “Green RLM62" and
“Night Black” for the upper surfaces.
When all was dry, I gave the model a coat of Future.
Decals:
The Techmod decals are very thin and need to be handled carefully, but
they are not the kind of decals that stick to the first surface they touch, so
it is not hard to get them in position.
They snuggled right down under a coat of Micro-Sol.
| FINAL CONSTRUCTION |
I gave the model a coat of Xtracrylix “Satin” varnish, after which I
applied exhaust stains with Tamiya “Smoke.”
I then proceeded to assemble and attach the landing gear, the flaps, the
prop and the canopy.
| CONCLUSIONS |
 Another winner from Montex - this is one of the two best kits of the Yak
series of fighters available (the other being the Accurate Miniatures 1/48 kit).
For what you get, the price is very reasonable.
As they say about a good movie, “it’s all up there on the screen.”
The design is so good that a modeler could only screw up the kit by
throwing it against a brick wall or dropping it out of a window onto concrete.
This is the kind of model that will make an average modeler good and a
good modeler great. Anyone who has
done at least one or two all-resin kits will have no trouble with this kit.
Another winner from Montex - this is one of the two best kits of the Yak
series of fighters available (the other being the Accurate Miniatures 1/48 kit).
For what you get, the price is very reasonable.
As they say about a good movie, “it’s all up there on the screen.”
The design is so good that a modeler could only screw up the kit by
throwing it against a brick wall or dropping it out of a window onto concrete.
This is the kind of model that will make an average modeler good and a
good modeler great. Anyone who has
done at least one or two all-resin kits will have no trouble with this kit.
May 2009
If you would like your product reviewed fairly and quickly, please contact me or see other details in the Note to Contributors.