
Eduard 1/48 Spitfire IXc redeux
| KIT #: | 8281 |
| PRICE: | 3600 yen at Hobby Link Japan |
| DECALS: | Five options |
| REVIEWER: | Tom Cleaver |
| NOTES: | Profipak |
| BACKGROUND |
Eduard’s new
Spitfire IX has been hailed as the best, most accurate kit of this iconic
fighter yet released in 1/48 scale, and that is the truth.
Now that it’s possible to do a Spitfire model that’s right, it’s time to
consider doing a Spitfire model that is Correct.
| WHAT YOU SHOULD KNOW |
Eduard’s
instructions are wrong as relates to what particular detail parts should be
used. Specifically, the kit
instructions say to use the “bulged” top cowling piece for all these “late
version” Spitfire IX options that have been included.
Wrong! The bulged cowling was introduced onto the production lines in
August 1944, for the specific purpose of covering the Packard-Merlin engine used
for what became the Spitfire XVI.
In the interest of reducing production costs, the new cowling became standard on
all Spitfire IX and XVI aircraft produced after that date.
All Spitfire IX’s produced before that date had the “flat” cowling.
The new production Spitfires didn’t start showing up in operational units
before early October. All the
Spitfires
 offered
as options in the Eduard kit are airplanes used during the invasion of Europe in
the summer of 1944, and one MTO airplane that was obviously an early aircraft.
Thus, they should all use the “flat” cowling.
In my case, the part was easy to pop off the model since Tenax doesn’t
make a real thorough join if you use it lightly.
I still had the other cowling parts, so the model was soon properly
configured.
offered
as options in the Eduard kit are airplanes used during the invasion of Europe in
the summer of 1944, and one MTO airplane that was obviously an early aircraft.
Thus, they should all use the “flat” cowling.
In my case, the part was easy to pop off the model since Tenax doesn’t
make a real thorough join if you use it lightly.
I still had the other cowling parts, so the model was soon properly
configured.
 the
earlier Spitfire V horizontal stabilizer and elevator, which was fitted to those
first 500-odd Spitfire Ixs and perhaps to some others depending on availability,
was often replaced at repair depots when an airplane came through with some sort
of damage to one stabilizer or the other; both would be replaced with the later
stabilizer and elevator with the extended horn.
the
earlier Spitfire V horizontal stabilizer and elevator, which was fitted to those
first 500-odd Spitfire Ixs and perhaps to some others depending on availability,
was often replaced at repair depots when an airplane came through with some sort
of damage to one stabilizer or the other; both would be replaced with the later
stabilizer and elevator with the extended horn.
Finally, from
photographic evidence in the Osprey book “126 Wing RCAF” and Chris Shores’
“Second Allied Tactical Air Force,” the supposed “hard and fast” rule that the
cannon position was switched out on airplanes with the “c” wing (cannon in
inboard position) to the outer position for purposes of turning the airplane
into a fighter bomber at the time of the Normandy Invasion is not true.
Both books have a considerable number of photos that are identifiable as
being taken as late as early 1945, where the cannons are in the inboard
positions, and the bomb racks are in place.
In 126 Wing RCAF, it would appear from the photographic evidence that the
“e” wing airplanes (cannon in the outer position) were all new production
aircraft delivered to replace losses, with no attempt made to change the cannon
positions of the earlier airplanes in a unit.
| WHY THIS IS IMPORTANT |
Thus, for “early”
and “mid” production Spitfires, all the visual clues that supposedly
differentiate them are not necessarily so.
Essentially, the only Spitfire IX that would be certain to have a
specific configuration would be the Spitfire Ixe and XVIe, which would have the
cannon in the outer position and the bulged cowling.
Even this is not necessarily so, since the “e” wing Spitfire IXs began
delivery as early as March 1944; while the cannons were in the outer position,
and did not have the .50 caliber machine guns in the inboard position due to
lack of availability; these early “e” wing aircraft had the .30 caliber weapons
in the outer wing.
Now that you are
thoroughly confused, the end result of all this is that one should have a few
photographs of the particular airplane being modeled, to discover what the
actual physical condition and layout of the airplane was.
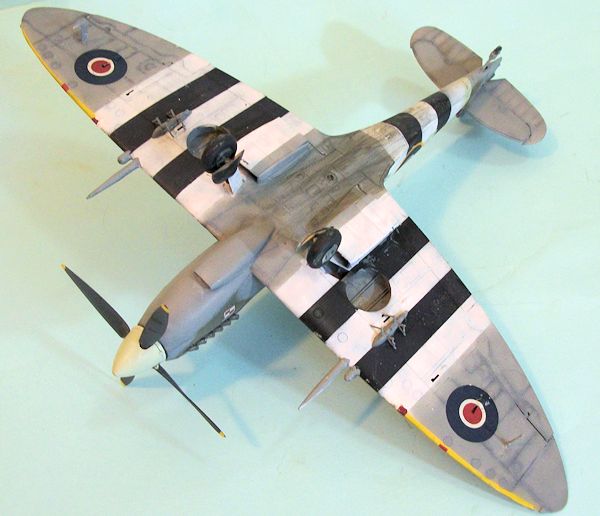
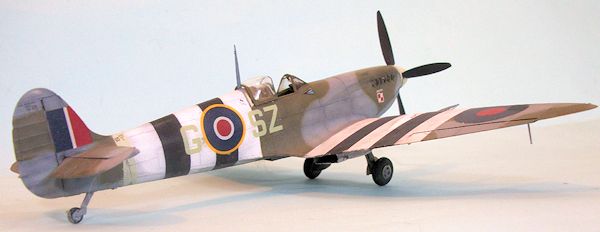
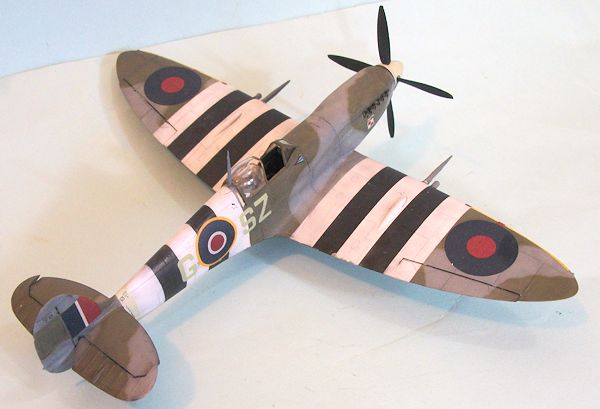
Speaking of D-Day
stripes, there are again no “hard and fast” rules for their application.
The standard instructions for single-engine aircraft were three white and
two black alternating stripes, each 18 inches wide.
Many units painted their Spitfires with this marking.
However, many squadrons also narrowed the fuselage stripes to 15 inches,
so as not to completely overlap the serial number. Spitfires with the 18 inch
stripes on the fuselage appear to have frequently overpainted the serial number
as well as all or nearly all of the sky rear fuselage band, depending on how far
behind the canopy the stripes began; within a unit, both 18-inch and 15-inch
fuselage stripes can be seen in photos, with stripes starting at various
positions behind the canopy, and with serials both painted out entirely or
partially, or left alone or repainted.
Then there is 10 Group, which used stripes 9 inches wide on both fuselage
and wings. Again, it’s a good idea
to look at a photograph.

| AND SO |
If accuracy
matters to you Spit Boffins the way it matters to the 109 Nutz when it comes to
these matters, be sure to use photos when choosing the physical layout and the
markings of the airplane you are r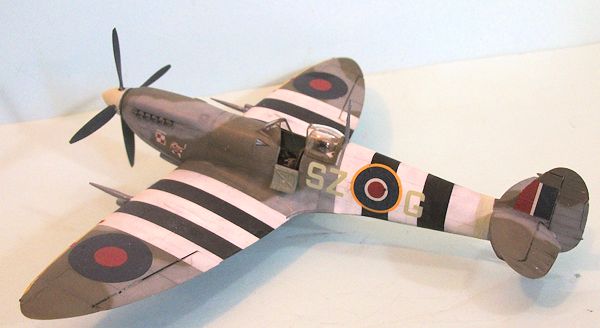 epresenting.
If you pay attention to all of the above, you won’t be stuck with having
to take a Mulligan on your model as I did.
With the many new aftermarket decal offerings that have been released
recently or are soon to be released, not to mention the many sheets out there no
longer in production, there are many options for your Spitfire kit (so long as
you mostly like Ocean Grey/Dark Green/Sea Grey Medium paint schemes).
epresenting.
If you pay attention to all of the above, you won’t be stuck with having
to take a Mulligan on your model as I did.
With the many new aftermarket decal offerings that have been released
recently or are soon to be released, not to mention the many sheets out there no
longer in production, there are many options for your Spitfire kit (so long as
you mostly like Ocean Grey/Dark Green/Sea Grey Medium paint schemes).
June 2013
If you would like your product reviewed fairly and fairly quickly, please contact the editor or see other details in the Note to Contributors.