| KIT #: | 5117 |
| PRICE: |
1,920 Yen
(US$23.00) at HobbyLink |
| DECALS: | Two options (both units that flew it) |
| REVIEWER: | Tom Cleaver |
| NOTES: |

| HISTORY |
Almost all of the developmental history of the Spitfire during the
Second World War revolved around attempts to outperform the Focke‑Wulf Fw‑190.
In addition to the development of the Spitfire IX, the need to combat the German
fighter in its low‑level fighter‑bomber version led directly to the creation of
the Spitfire XII, the first of the Griffon‑powered Spitfires.
In 1942, with the Luftwaffe’s bomber force largely engaged on the
Eastern Front, and most of the other bomber units not on the Eastern Front
committed to the Mediterranean, there was almost no offensive capability left
among the units stationed on the Channel Front. The arrival of the Fw‑190A‑4/U4
Jagdbomber “Jabos” gave JG‑26 and JG‑2
the capability of mounting low‑level raids on southern England as far inshore as
London. Each unit had a Jabostaffel,
giving a total of 24 aircraft between them for attacking England. These
few airplanes gave the RAF fits, since their tactic was
to cross the Channel at wave‑top height, under the radar, and hit various towns
and other targets in southeastern England with two to four aircraft per mission.
After dropping their bomb, each Wurger would dive back
to wave‑top height and skedaddle at full‑throttle back to northern France. They
were called "tip and run" raids. While they did little real damage, the raiders
gave the RAF a major headache because of the public outcry over the raids, which
forced the RAF to employ a much larger force in an attempt to stop the Jabos.
 Given the short response time between spotting the
raiders inbound and their retreat to France, the only defense was to mount
standing patrols over southern England.
This required a much larger force of aircraft on these
duties than the Germans were using for the attacks. The Spitfire V ‑ the main
equipment of Fighter Command at the time ‑ was no match for the Fw‑190 in
conventional combat, and was nowhere near fast enough to catch its opponent at
low level. In 1942, the Hawker Typhoon was the only RAF fighter with any chance
of catching up to the Fw‑190s in a low‑level stern chase once the German fighter
was free of its bomb, and even then this only worked if the controllers had
positioned them well. Something better was needed, and needed fast.
The Rolls‑Royce Griffon II engine with single‑stage two-speed
supercharger had become available in late 1940, offering a considerable increase
in power over the Merlin at low altitudes. The Spitfire IV (Type 337) ‑ later
renumbered the Spitfire XX after the arrival of the photo‑recon P.R.IV series ‑
had been developed to use this power plant, with first flight of the prototype
DP485 in 1941. Further development was desultory until the arrival of the German
Jabos. With the focus on a low‑altitude fighter capable of chasing and catching
the Focke‑Wulf, the Type 366 Spitfire XII quickly appeared, this being a Mark Vc
airframe powered by a Griffon II. The airplane’s top speed at 5,000 feet was 393
m.p.h., which was fast enough to catch the Fw‑190s. One hundred Spitfire XIIs
were eventually built, based on the Mk.V and Mk.VIII airframes.
Originally, these were visually distinguished by having
either a fixed (Mk. V) or retractable (Mk.VIII) tail wheel, though all were
modified to have the retractable unit during the course of 1943, as well as
eventually being equipped with the later horizontal stabilizer with enlarged
elevator horns.
The wings were clipped to improve the rate of roll at lower
altitude.
In February 1943, 41 Squadron exchanged its Spitfire Vbs for
Spitfire XIIs. For the pilots, the primary difference was that the Griffon
rotated in the opposite direction to the Merlin, giving a strong swing to the
right on takeoff rather than the previous left swing. The unit was declared
operational in April 1943 and moved to Hawkinge in southeastern England. Their
first victory was a Ju‑88 shot down off Calais on April 17. That same month, 91
Squadron began their conversion, joining 41 at Hawkinge in May.
The worst problem the pilots faced at the outset was convincing
the Typhoon pilots that the Spitfire XII, which had clipped wingtips, was not a
Bf‑109. If the Spitfire pilot spotted the diving Typhoon in time, they could
just outrun the big Hawker fighter.
 On May 25, 1943, six Spitfire XIIs of 91 Squadron
intercepted a force of Focke‑Wulf Jabos attacking Folkestone and claimed six in
the cross‑Channel chase that ensued, two being claimed by the OC, Squadron
Leader Ray Harries. By August, Harries had become the first pilot to score more
than five victories in the Mk. XII and was promoted to Wing Commander to lead
the two squadrons.
The Wing fought its most successful action on October 20, 1943,
when the two squadrons mounted a fighter sweep over northern France. Near Rouen,
they were attacked by 25 Fw‑190s and Bf‑109Gs of JG26. In the battle that
followed, the Mk. XII pilots claimed eight Germans for no losses to themselves.
Shortly thereafter, 91 Squadron converted back to the
Spitfire Vb and then to the Spitfire IX, leaving the limited number of Spitfire
XIIs available as replacements for 41 Squadron now that the “tip and run” raids
had been stopped.
The Mk. XII remained in service with 41 Squadron through the
summer of 1944, when it was used against the V‑1 "buzz bombs." The unit
converted on to the Spitfire XIV in late August/early September before moving to
the Continent that fall.
| THE KIT |
Over the years, there have been several conversion sets
made to allow a modeler to put a Spitfire XII in the collection.
This being one of my favorite marks of Spitfire, I have
done them all: the hack-and-glue conversion using a Hobbycraft Seafire XV and
the Classic Airframes set with replacement nose and outer wings in resin - both
used with the
Tamiya Spitfire Vb -
and the Aeroclub full-fuselage conversion for use with the Hasegawa Spitfire IX
kit.
When I participated in developing the Victory Productions decal sheet
“Spitfire: Aces of the Empire,” we made sure to include two Spitfire XIIs.
I am even now preparing to do the 1/32 conversion with
the Greymatter nose and wings, and a Hasegawa Spitfire Vb kit.
 While there have been several announcements over the
past few years of a coming injection-molded Spitfire XII from differing
companies, this new kit is the first time any manufacturer has actually made
good on the threat.
After going on the ropes in the past few years and
nearly being given up for dead, Airfix has returned over the past year since
their acquisition by Hornsby, with some interesting new releases of varying
quality levels.
While this new Spitfire is not up to the sublime heights achieved
by the Spitfire 22/24 and Seafire 46/47 kits from 1995, it is head and shoulders
above every other 1/48 Spitfire kit Airfix has ever released otherwise.
The kit comes on two sprues of light grey plastic, with
a nicely-detailed cockpit - not as detailed as that found in the Hasegawa
Spitfire IX, it is certainly the next-best to that, and more than adequate in
this scale.
One needs only to get a set of 1/48 photoetch seatbelts to “seal
the deal.”
Unfortunately, the kit does not include an instrument panel
decal, its one failing; fortunately, I have an Eduard photoetch panel, which
will be put to use here.
Both tail wheel alternatives - fixed and retractable -
are catered for here. All control surfaces are separate, allowing them to be
posed dynamically, while the elevators are connected to insure proper alignment.
Fabric detail on the rudder and elevators looks very
appropriate.
Do be aware that while the flaps can be posed down, any Spitfire
pilot who did not immediately retract the flaps on touchdown was liable to a
50-Pound fine (not insubstantial when the monthly pay of a Pilot Officer was 70
Pounds).
For some reason, the elusive shapes of Griffon prop
spinners have frequently eluded manufacturers, but Airfix got this one right, as
they also did with the even more elusive shape of the Spitfire XII prop blades.
The clear canopy parts are very clear and quite thin.
Airfix has done something clever for the open canopy
alternative,
 molding
the rear cockpit glass integrally with the canopy, so it can be seen, while not
resulting in the canopy sitting too high as is frequently the case with
injection-molded parts.
While the engraved panel surface detail is less petite
than on the Spitfire 22/24 and Seafire 46/47, it is not so bad as was the case
with the Godawful Seafire III kit, and looks like all will be well under the
proverbial “coat of paint” from what I have seen so far of built-up models from
this kit.
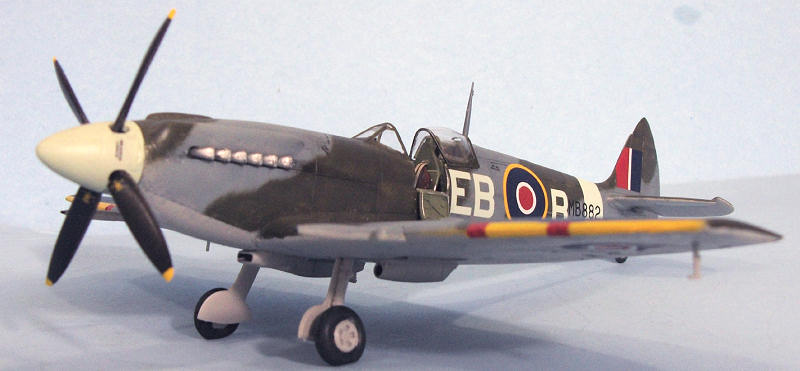
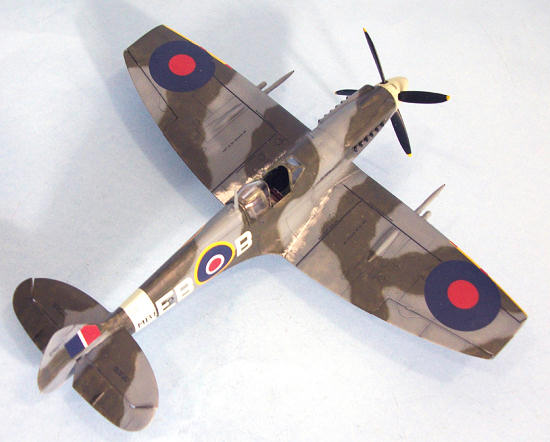
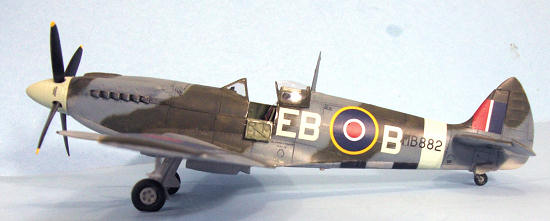
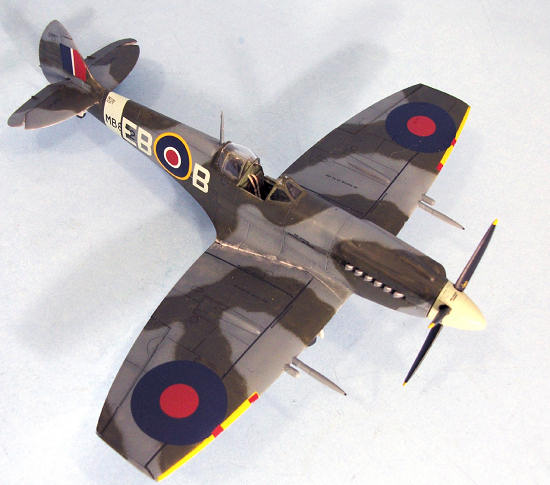
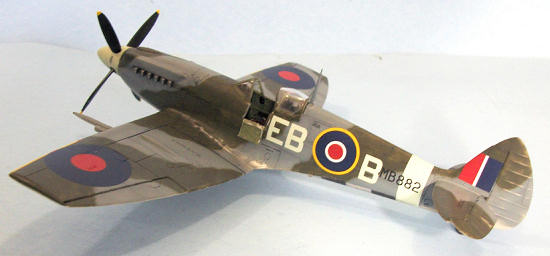
The decals provide markings for the Spitfire XII flown by Squadron Leader Ray Harries of 91 Squadron, the top-scoring pilot on the type, which has the early fixed tail wheel, and the much-photographed EB-B of 41 Squadron, which uses the later retractable tail wheel.
| CONSTRUCTION |
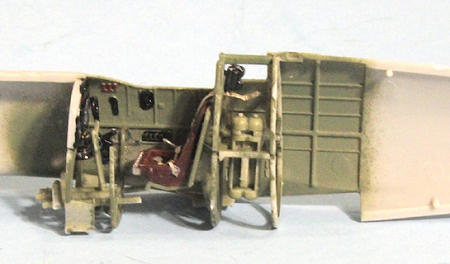 Construction
is very straightforward.
The cockpit is not super-detailed, but when completed it
looks “good enough” in this scale.
Those who need to “gild the lily” have plenty of resin
cockpits to choose from, all of which will likely fit, though they really aren’t
necessary.
I did use Eduard photoetch seatbelts, which really did make
things look good.
After painting the cockpit and before proceeding to
assemble it, I assembled the wing.
I attached both the flaps in the up position, and the
ailerons in neutral, to the lower half before gluing the upper parts.
This allowed a good bond from inside, that didn’t fill
the gaps so totally as would have been the case attaching these after assembling
the wing.
This is definitely necessary if you are raising the flaps, since
there are no positioning tabs on these parts, and getting them right once the
wing is assembled will be difficult; this way you can work on them from inside
and outside.
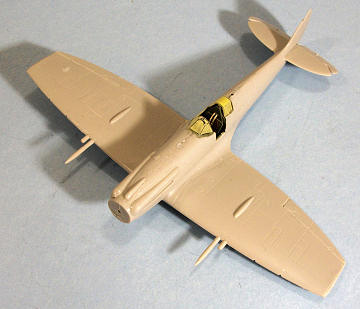 Once the cockpit was assembled and I had cut out the
area of the rear fuselage for the retractable tailwheel, I glued the fuselage
together and then attached the wing.
I only needed a very little bit of filler on the inner
wing leading edge to smooth out that joint, and to fill a very narrow gap at the
lower rear of the wing subassembly between it and the rear fuselage.
The wing has “positive alignment,” since you will know
you have it right when it “clicks” into position with the fuselage.
This was one of the first Spitfire kits ever that didn’t
need even a little gap filler for the upper wing-fuselage joint.
After examining the cockpit parts, I decided that the
“molded in” open part was not as good as claimed, since I could obtain a better
fit of both the rear glass and the sliding canopy with just a little thinning of
the rear edge of the sliding canopy to get a very realistic final look.
Of course, a Squadron/Falcon vac canopy (use the one for
the Hasegawa Spitfire IX) will look even better and I would have used one if I
had one, but the kit canopy will look acceptable here with just a bit of
thinning of the edges of the sliding portion and the windscreen.
With all that, assembly was complete and it was time to
proceed to the paint shop.
| COLORS & MARKINGS |
 After reading about 41 Squadron in the Osprey “Griffon
Spitfire Aces” book, I thought it would be interesting to do EB-B as she likely
looked toward the end of her time on operations, when she scored the final
victories for the type against the Luftwaffe that September, 1944, with D-Day
stripes on the lower rear fuselage, and a “dinged” paint scheme, rather than
nice and new as she appeared in the famous Charles Brown photos.
This was what I proceeded to do.
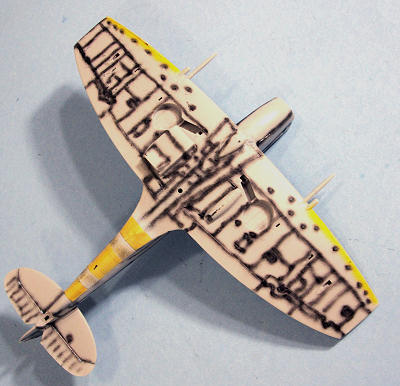
I first “pre-shaded” the model with Tamiya flat black
airbrushed on the panel lines, then masked off the black D-Day stripes and
painted the white stripes.
While that was setting up, I painted the yellow wing
leading edges.
When these areas were dry, I masked them off.
I painted the Temperate Land Scheme using Tamiya’s new
“Sea Grey Medium” (“RAF Light Grey” on the bottle) and Tamiya “Light Grey”
XF-66, which is “Ocean Grey.” After “after-shading” both colors once applied
(using the “RAF Light Grey” to lighten the XF-66 Light Grey just a bit), I then
airbrushed Xtracrylix “RAF Dark Green” and then “after-shaded” by lightening the
color with white.
When all was dry I unmasked the model and applied a coat
of Future.
The decals went on easily with Micro-Sol. When set and dry, I washed off the model and applied another coat of Future.
| CONSTRUCTION CONTINUES |
I “dinged” the airframe with Tamiya “Flat Aluminum”
along panel lines and walk ways, then used Tamiya “Smoke” for the exhaust stains
on the fuselage side and the oil stains on the wing underside.
I then gave the model an overall coat of Xtracrylix Flat
Varnish.
I attached the landing gear and props, unmasked the
canopy and attached the sliding section in the “open” position.
| CONCLUSIONS |
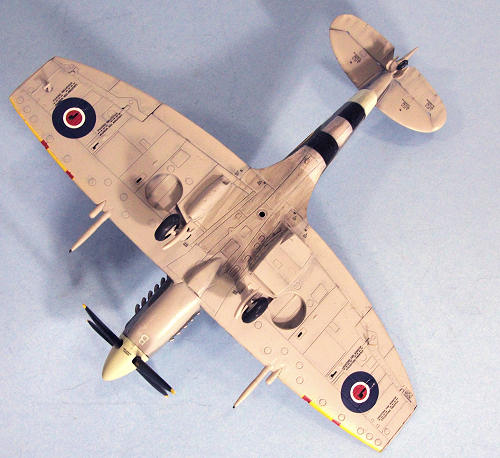
The model is easy to assemble and looks very good
sitting next to the last good Airfix Spitfires, not to mention the (corrected)
Hasegawa and ICM kits.
With any luck they’ll bring out a Spitfire XIV of equal
quality.
Highly recommended for anyone past “beginner.”
Tom Cleaver
March 2011
Review Kit courtesy of
HobbyLink Just a quick editorial note. Every company that has
been purchased by Hornby (as has Airfix), has always returned to profitability
and a better company that what it was before. I'm sure we all appreciate the
efforts Hornby have put into Airfix as not only are they producing nice, new
kits, but they are producing them at a price we can afford. Ed If you would like your product reviewed fairly and quickly, please
contact
me or see other details in the
Note to
Contributors.