Fly 1/32 Hurricane IIC
| KIT #: | 32012 |
| PRICE: | $100.00 SRP |
| DECALS: | Six options |
| REVIEWER: | Tom Cleaver |
| NOTES: | Xtracrylix 32062 “Hawker Hurricane Mk.IIc Pt 1", and SAC metal landing gear used. |
| HISTORY |
 The cannon-armed
Hurricane first appeared as the Mark IIA Series 2 in the spring of 1941. It was
redesignated Mark IIC in June 1941, using a slightly modified wing that included
a hardpoint for a 500 lb or 250 lb bomb. In the fall of 1941 it appeared with
plumbing for fixed 40 gal fuel tanks. The weight penalty imposed by the four
cannon armament meant that performance was inferior to the latest German
fighters; the Hurricane IIc served primarily in the ground-attack role in North
Africa and Southeast Asia, where it last saw operational service. Hurricane
IIc’s were also modified as Sea Hurricanes and equipped at least one FAA
squadron in the spring and summer ogf 1944, where the aircraft were used as
U-boat strafers. The Hurricane IIc also served as a night fighter and
"intruder" in the ETO, the last combat use of the Hurricane in northern Europe.
The cannon-armed
Hurricane first appeared as the Mark IIA Series 2 in the spring of 1941. It was
redesignated Mark IIC in June 1941, using a slightly modified wing that included
a hardpoint for a 500 lb or 250 lb bomb. In the fall of 1941 it appeared with
plumbing for fixed 40 gal fuel tanks. The weight penalty imposed by the four
cannon armament meant that performance was inferior to the latest German
fighters; the Hurricane IIc served primarily in the ground-attack role in North
Africa and Southeast Asia, where it last saw operational service. Hurricane
IIc’s were also modified as Sea Hurricanes and equipped at least one FAA
squadron in the spring and summer ogf 1944, where the aircraft were used as
U-boat strafers. The Hurricane IIc also served as a night fighter and
"intruder" in the ETO, the last combat use of the Hurricane in northern Europe.
| THE KIT |
The Hurricane was first produced in 1/32 by Revell in the late 1960s, as a Mk.I that was later “updated” (incorrectly) to a Mk.II in a final release; this kit is best left to collectors who won’t be building it. Pacific Coast Models released the Mk.I in both “ragwing” and “metal wing” versions, which I reviewed here. This kit by Fly is the first accurate Mk.IIc to be released in this scale.
 The Fly kit is a
“limited run” kit, but it provides what has to be the best surface detail of any
Hurricane kit in any scale released by anyone. The Hurricane was not
flush-riveted, and Fly has produced the best raised-rivet detail I have ever
seen on any kit, being both petite and accurate. Other details are counter-sunk
as they should be, with some panels for the guns raised above the surface as
they should be. The ailerons are molded integral, and might be served well by
passing a razor saw along their break lines to emphasize they are separate. The
rudder and elevators are separate, allowing a dynamic pose for the final result.
The fabric areas are perfect, no huge “hills and valleys” as other manufacturers
have done. I am glad to report that if you take care in assembly, you will use
only a very little seam filler, and thus can keep this beautiful detail without
problem.
The Fly kit is a
“limited run” kit, but it provides what has to be the best surface detail of any
Hurricane kit in any scale released by anyone. The Hurricane was not
flush-riveted, and Fly has produced the best raised-rivet detail I have ever
seen on any kit, being both petite and accurate. Other details are counter-sunk
as they should be, with some panels for the guns raised above the surface as
they should be. The ailerons are molded integral, and might be served well by
passing a razor saw along their break lines to emphasize they are separate. The
rudder and elevators are separate, allowing a dynamic pose for the final result.
The fabric areas are perfect, no huge “hills and valleys” as other manufacturers
have done. I am glad to report that if you take care in assembly, you will use
only a very little seam filler, and thus can keep this beautiful detail without
problem.
The cannons are provided in injected plastic (best discarded), and the two different styles of gun barrels in resin. The wheel well is also resin, as is the seat and the exhausts. The canopy is injection plastic, but if you feel the need you can get a vacuformed canopy from Fly. Photoetch frets include the seat belts, instrument panel, and radiators. This kit did not include bomb racks or bombs, but Jiri has informed me that the formal “tropical” release will include these items. There is also a Sea Hurricane release scheduled.
 Decals are provided
for no less than six different Hurricanes: The schemes are: BE581, JX E, 1
Squadron, flown by F/Lt. Karel Kuttelwascher (early camo version); BE581, JX E,
1 Squadron, flown by F/Lt. Karel Kuttelwascher (late camo version); BE500, LK A,
87 Squadron, RAF Cawnpore, flown by Sqn/Ldr. Dennis Smallwood; BD936, ZY S, 247
Squadron; LF630, WC S,309 Polish Squadron, RAF; LF345, ZA P, Post war.
Decals are provided
for no less than six different Hurricanes: The schemes are: BE581, JX E, 1
Squadron, flown by F/Lt. Karel Kuttelwascher (early camo version); BE581, JX E,
1 Squadron, flown by F/Lt. Karel Kuttelwascher (late camo version); BE500, LK A,
87 Squadron, RAF Cawnpore, flown by Sqn/Ldr. Dennis Smallwood; BD936, ZY S, 247
Squadron; LF630, WC S,309 Polish Squadron, RAF; LF345, ZA P, Post war.
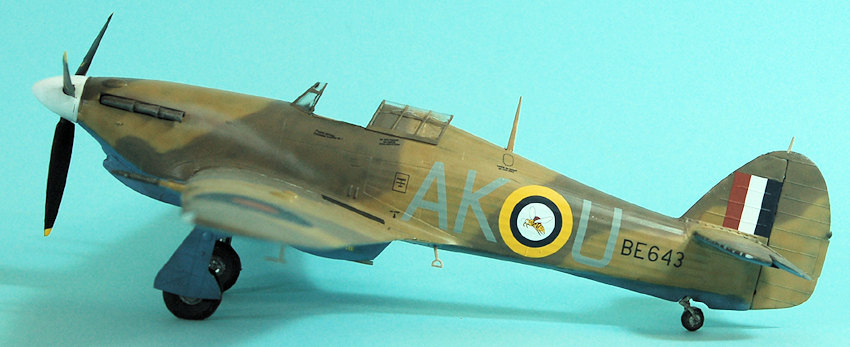
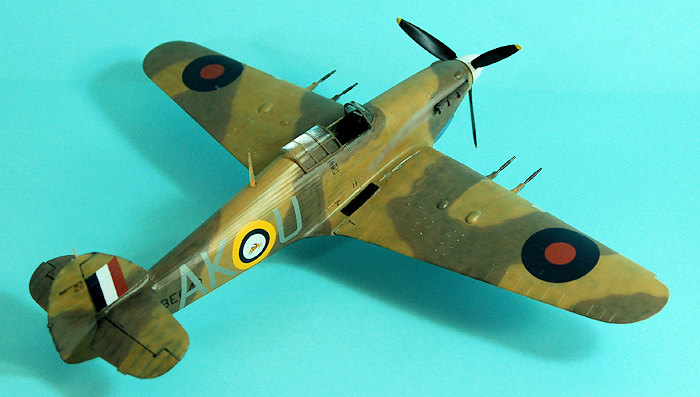
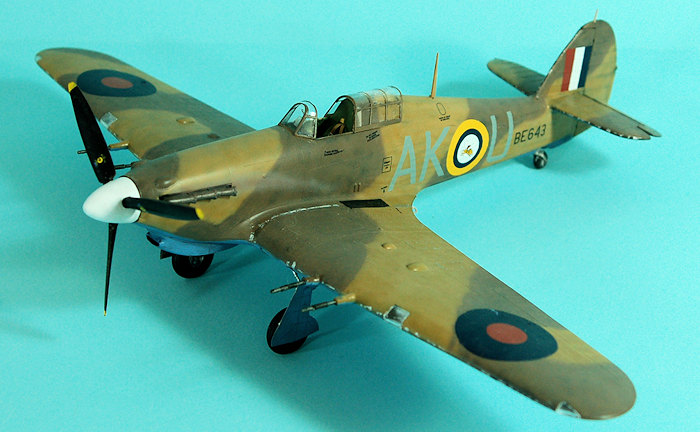
Xtracrylix has also released two sheets for this kit, X32062: Hurricane IIc Part 1, and X32063, Hurricane IIc Par 2. These allow a modeler to do some different night fighters, and tropical Hurricanes in the Middle East and the Far East. I chose to use X32062 and do BE643 of 213 “Hornet” Squadron in Egypt in early 1942.
The construction manual is very clear, with well-drawn illustrations and a logical assembly sequence that, if followed, will result in an excellent model.
| CONSTRUCTION |
After looking at the resin wheel well, I decided to begin construction with the wing. Taking off the molding block completely is imperative, after which it is a good idea to dremel down the upper surface until you start to see light through it, to insure it fits inside the wing properly. Doing this was in fact the hardest part of the whole project.
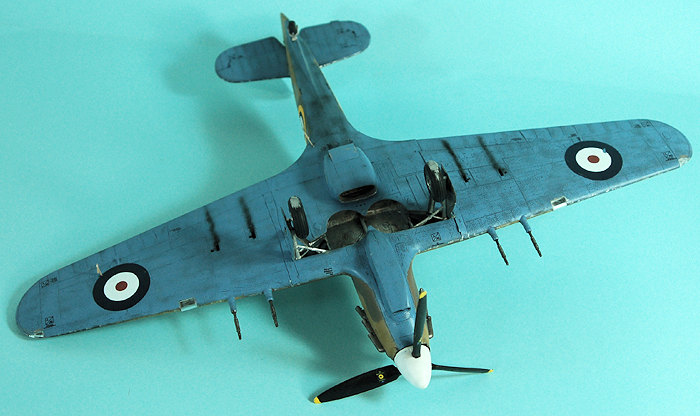
It is important before proceeding to clean out the shell ejection ports on the lower wing halves. A few minutes with a $11 Xacto took care of all of that easily.
 I then assembled the
interior bits for the wheel well and glued it to the lower wing center section.
I then assembled the outer lower wing halves and upper wing halves, and then
glued each wing to the center section, and rubber-banded them to insure they set
up properly to give the correct wing dihedral.
I then assembled the
interior bits for the wheel well and glued it to the lower wing center section.
I then assembled the outer lower wing halves and upper wing halves, and then
glued each wing to the center section, and rubber-banded them to insure they set
up properly to give the correct wing dihedral.
I painted the interior of the fuselage and the cockpit parts, then assembled the “cage.” The assembly is a bit “fiddly,” but, again, take your time and all will be well. I then glued the fuselage halve together, then inserted the cockpit assembly. Since I had test-fitted the upper wings to the fuselage before beginning, the wing fit well to the fuselage. I then attached the horizontal stabilizers. All the joints needed some Mr. Surfacer 500, but only a bit, which insured a minimal loss of surface detail when sanding them out.
I painted and assembled the photo-etch radiators and then attached the radiator assembly to the lower wing. Since I was doing a tropical Hurricane, I assembled the Vokest filter. This took considerable test fitting to get it to attach smoothly to the lower nose, and ended up with the most filler to take care of the gaps in attachment.
| COLORS & MARKINGS |
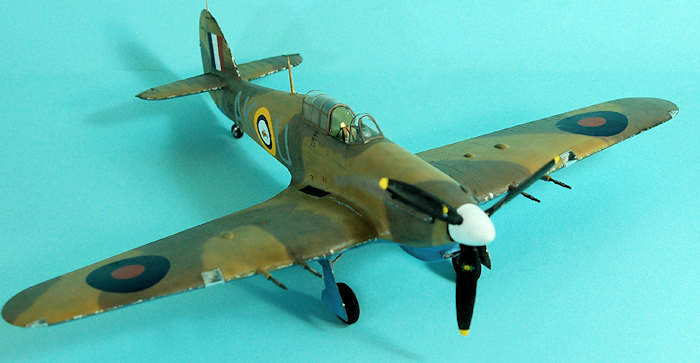
I painted the model overall flat black, then painted the desert camouflage freehand, using Xtracrylix Dark Earth, Middle Stone and Azure Blue. When it was dry, I gave the model an overall coat of clear gloss varnish.
 The kit decals were
used for the stencils, and they went on without problem under Micro-Sol. I had
to use Solvaset to get the somewhat-thicker Cartograph decals of the XtraDecals
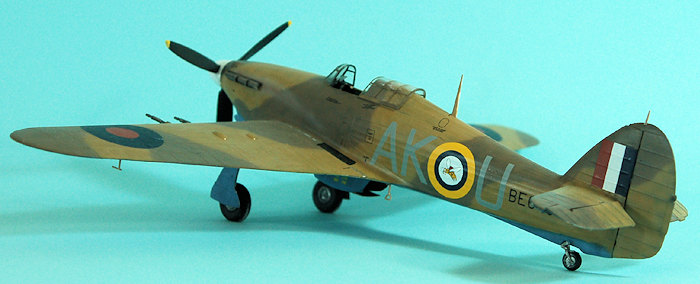
sheet to melt down over the raised surface detail. I chose the 213 Squadron
airplane because of the unusual Hornet Squadron marking applied to the fuselage
national insignia.
The kit decals were
used for the stencils, and they went on without problem under Micro-Sol. I had
to use Solvaset to get the somewhat-thicker Cartograph decals of the XtraDecals
sheet to melt down over the raised surface detail. I chose the 213 Squadron
airplane because of the unusual Hornet Squadron marking applied to the fuselage
national insignia.
I gave the model an overall coat of thinned Tamiya Clear Flat, then “dinged” it and applied the kind of exhaust stains associated with an engine leaned out to extend fuel usage, starting with some thinned Tamiya Sky Grey, thinned Tamiya Hull Red, and then Tamiya Smoke. The canopy was unmasked and attached in the open position. I used Scale Aircraft Conversions metal landing gear for the main gear and tailwheel, since they were stronger than the plastic parts.
| CONCLUSIONS |
This kit is one of the best Hurricane kits available. It has the best surface detail of any Hurricane kit in any scale. Assembly is straightforward and easy if you have experience with limited-run kits. Take your time and you will get a very nice result.
Highly recommended.
11 August 2016
Copyright ModelingMadness.com
Thanks to Fly Models for the review kit. Thanks to David Hannant for the decals.
If you would like your product reviewed fairly and fairly quickly, please contact the editor or see other details in the Note to Contributors.