
| KIT: | Hasegawa 1/48 P-40K Warhawk (conversion) |
| KIT #: | ? |
| PRICE: | $29.95 MSRP |
| DECALS: | Two options |
| REVIEWER: | Tom Cleaver |
| NOTES: | AMtech resin tail used. |
| HISTORY |
The P-40 suffered from the beginning with the aerodynamic problems of being a ”short-coupled” airplane, which was the result of 1930s knowledge of aerodynamics: faster airplanes up to the late 1930s were almost all short-coupled, from the extreme of the Gee Bee racers to less-radical designs like the P-36, whose original design dated to 1934. The problems associated with this type of design became more prominent with the P-40, since it was heavier and used a higher-powered engine. The most prominent problems associated with this was a pronounced swing on takeoff, directional instability in flight, and the nasty reaction the airplane had to being put into a high-speed stall, which - unless the pilot was very good and unloaded quickly - would result in a snap roll and a flat spin that was impossible to get out of due to the short-coupling. Because of this, pilots had to be careful in combat if they got into a turning situation not to score a victory over themselves.
 The first attempt to resolve this problem was to enlarge the vertical fin,
both to provide directional stability and to allow for spin recovery from a
high-speed stall. The enlarged fin first appeared on late production
P-40E-1 and E-5 aircraft. This fin only included a curved dorsal extension
to the lower leading edge of the fin and turned out to be insufficient; a
redesign saw both the leading edge of the fin angled forward and a larger
dorsal fin extension, which was accompanied by the incorporation of a more
powerful Allison V-1710-73 (F4R) engine that gave 1,325 horsepower for
takeoff, and was known as the P-40K-1 and K-5. Beginning with the
P-40K-10, the Allison-powered P-40s adopted the extended fuselage first
introduced into production with the Merlin-powered P-40F-5. This redesign
finally solved the directional instability problem, but the P-40 had always
to be flown carefully in turns since the high speed stall characteristics
remained.
The first attempt to resolve this problem was to enlarge the vertical fin,
both to provide directional stability and to allow for spin recovery from a
high-speed stall. The enlarged fin first appeared on late production
P-40E-1 and E-5 aircraft. This fin only included a curved dorsal extension
to the lower leading edge of the fin and turned out to be insufficient; a
redesign saw both the leading edge of the fin angled forward and a larger
dorsal fin extension, which was accompanied by the incorporation of a more
powerful Allison V-1710-73 (F4R) engine that gave 1,325 horsepower for
takeoff, and was known as the P-40K-1 and K-5. Beginning with the
P-40K-10, the Allison-powered P-40s adopted the extended fuselage first
introduced into production with the Merlin-powered P-40F-5. This redesign
finally solved the directional instability problem, but the P-40 had always
to be flown carefully in turns since the high speed stall characteristics
remained.
The P-40K served with the 49th Fighter Group in New Guinea, the 51st and 23rd Fighter Groups in China, and with the RAF as the Kittyhawk III in North Africa.
The 51st Fighter Group, which first came to the China-Burma-India Theater with the India-based 10th Air Force in 1942, had responsibility for protection of the Indian end of the “Hump” air route from India to China. Originally and all-P-40 group, the 449th Fighter Squadron was re-equipped with the P-38 in early 1944 and became the high-scoring squadron of the group. Captain Ed Nollemeyer was one of the few P-40 pilots in the group to achieve 5 victories during his tour in 1943. The 51st FG transferred to the 14th Air Force in China where it joined the 23rd FG on operations until the end of the war.
| THE KIT |
Here is a link to the preview here in Modeling Madness.
| CONSTRUCTION |
When AMtech released their P-40K conversion for their P-40E kit, I was
struck by how much the resin piece seemed more suitable to the Hasegawa
kit, since the fabric detail on the rudder was more similar to the fabric
detail on the Hasegawa kit
 than it was for the AMtech kit. Interestingly,
the fuselage of this kit also broke at the exact place that would fit the
AMtech part, with the resin part being slightly wider than the Hasegawa
fuselage. Five minutes with the Dremel got rid of the interior attachment
bulkheads in the Hasegawa kit, while another five minutes with a file
narrowed the plug of the resin part sufficiently to fit the different
fuselage. Once that was glued in position, another final five minutes with
a sanding stick had the parts smoothed, with no more rescribing needed than
would be the case using the plastic tail from the kit.
than it was for the AMtech kit. Interestingly,
the fuselage of this kit also broke at the exact place that would fit the
AMtech part, with the resin part being slightly wider than the Hasegawa
fuselage. Five minutes with the Dremel got rid of the interior attachment
bulkheads in the Hasegawa kit, while another five minutes with a file
narrowed the plug of the resin part sufficiently to fit the different
fuselage. Once that was glued in position, another final five minutes with
a sanding stick had the parts smoothed, with no more rescribing needed than
would be the case using the plastic tail from the kit.
The other modifications for the Hasegawa kit involved fitting the plugs just aft of the exhausts, and using “fishtail” exhausts. Since these aren’t used in the kit, I robbed them from a Hasegawa Spitfire IX kit that I wasn’t going to use them on; these fit perfectly.
As I found when I built the P-40E kit, the trick to assembling this model
is to get a very good fit for all the
 “plug-in” parts so that the resulting
seams can be filled with Mr. Surfacer 500 and sanded away easily.
“plug-in” parts so that the resulting
seams can be filled with Mr. Surfacer 500 and sanded away easily.
I used the last of my resin P-40E cockpits on this model; I think these cockpits are just “that much better” than the kit cockpit that they are worth the additional expense. I would also recommend obtaining the Falcon/Squadron vacuformed P-40E canopy -which I didn’t do here - because the sliding portion will fit with a much more accurate look than does the injection-molded kit canopy.
Once the model was assembled, it was time for the paint shop.
| COLORS & MARKINGS |
Painting:
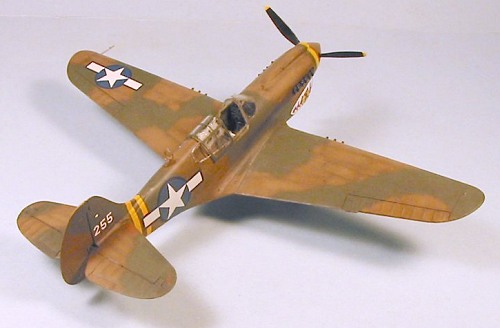
 There have been differing interpretations of Nollemeyer’s P-40K, with the
profile in the Squadron “Aces of the Southwest Pacific” book showing it as
OD/Grey. However, the photo of the actual airplane in the same book shows
a two-color upper camouflage, so this model was painted in the RAF
Temperate Land Scheme of US equivalent colors for Dark Earth, Dark Green
and Medium Sea Grey, for which I substituted Tamiya “Sky Grey” while using
the Gunze-Sangyo paints for the upper colors. The yellow stripe on the
nose and the stripes on the rear fuselage were painted first and masked
before I did any “pre-shading.” I freehanded the camouflage pattern using
a very thinned paint mixture to allow for a tight spray with the #1 tip of
my Paasche-H airbrush.
There have been differing interpretations of Nollemeyer’s P-40K, with the
profile in the Squadron “Aces of the Southwest Pacific” book showing it as
OD/Grey. However, the photo of the actual airplane in the same book shows
a two-color upper camouflage, so this model was painted in the RAF
Temperate Land Scheme of US equivalent colors for Dark Earth, Dark Green
and Medium Sea Grey, for which I substituted Tamiya “Sky Grey” while using
the Gunze-Sangyo paints for the upper colors. The yellow stripe on the
nose and the stripes on the rear fuselage were painted first and masked
before I did any “pre-shading.” I freehanded the camouflage pattern using
a very thinned paint mixture to allow for a tight spray with the #1 tip of
my Paasche-H airbrush.
When the paints were fully cured, I gave the model a coat of Future.
Decals:
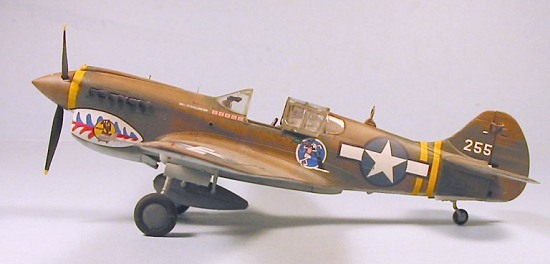
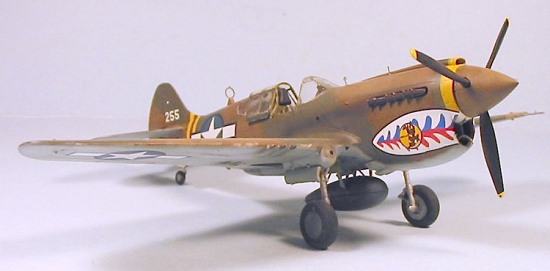
There was a very good set of markings for this airplane on an old Micro-Scale/SuperScale sheet that is no longer in production. I ended up getting decals from Scott Van Aken taken from the AMT P-40K kit (let me remark at this point that if you have the original AMT P-40K kit, that tail is accurate to do the “big tail” P-40E-1, but not a P-40K-1 or K-5). Unfortunately, all these markings are about 2 percent too big! I managed to trim the sharkmouth to where it would fit, and used the squadron marking. The other decals were out of the dungeon, using some national marking decals where the red surround had been overpainted blue, which is right for this airplane.
| FINAL CONSTRUCTION |
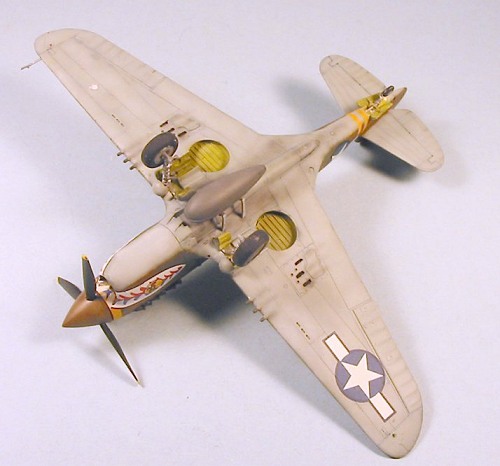
I did some weathering to the model, then gave it a coat of Xtracrylix Satin Varnish, followed by two coats of thinned Dullcote to get the sun-faded finish I was going for. I then attached the landing gear, gear doors, prop and canopy.
| CONCLUSIONS |
 Given Hasegawa’s penchant for doing every version they can of an airplane,
coupled with the production design of the kit, I am sure they will be
releasing their own “big tail” P-40s in the next couple of years; they
might even go so far as to do the two different “big tails.” Right now,
for those who don’t want to wait, using the AMtech resin part is easy to
do, with a nice result. I am also doing the AMtech kit with this
conversion, and it also makes up into a nice-looking model. Using the
Hasegawa kit is a little bit easier (since you don’t have to figure out
where to cut the rear fuselage), and the Hasegawa kit makes up into the
most accurate P-40 model in this scale.
Given Hasegawa’s penchant for doing every version they can of an airplane,
coupled with the production design of the kit, I am sure they will be
releasing their own “big tail” P-40s in the next couple of years; they
might even go so far as to do the two different “big tails.” Right now,
for those who don’t want to wait, using the AMtech resin part is easy to
do, with a nice result. I am also doing the AMtech kit with this
conversion, and it also makes up into a nice-looking model. Using the
Hasegawa kit is a little bit easier (since you don’t have to figure out
where to cut the rear fuselage), and the Hasegawa kit makes up into the
most accurate P-40 model in this scale.
June 2005
Thanks to AMtech for the conversion part. Review kit courtesy of my wallet.
If you would like your product reviewed fairly and quickly by a site that has around 300,000 visitors a month, please contact me or see other details in the Note to Contributors.