FW190 Winter Diorama
Siverskaya – Leningrad Sector
1942
Review, Construction and Photos by : Ray Snazel
|
HISTORY / BACKGROUND |
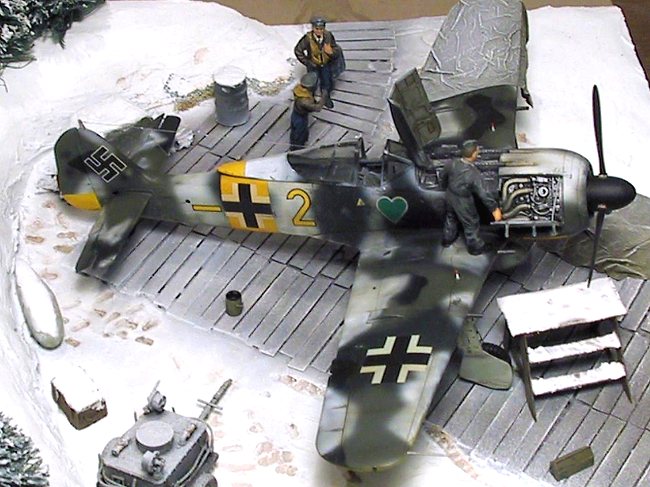
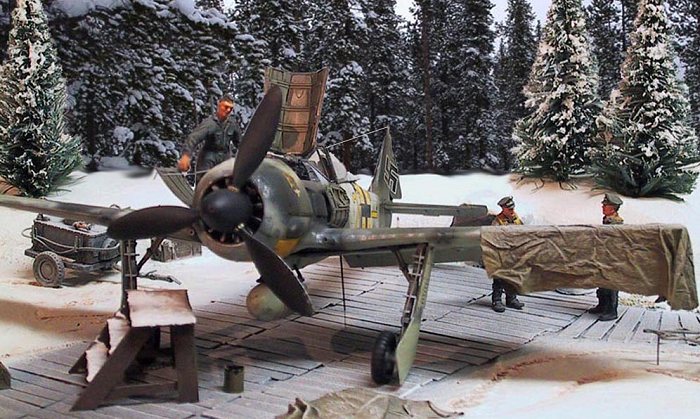
This Diorama started out as an ambitious model of a FW-190 in Winter/Spring Camouflage from the eastern front, once the model was completed I had the basis to complete and attempt something I have always wanted to do, a winter diorama. The problem was I have never seen one done that looked real and there is not much out there for reference on how to pull this off. I spoke to everyone I know about it and most just shrugged their shoulders and tried to talk me into putting it on grass and saying it was spring. Nope, I had to try this and I am thrilled with the result. I will try to explain as best I can how this all came together and hopefully readers will get some ideas and maybe pass them on to me or the site, I would love any tips anyone has. Lets get to it.
|
THE BITS |
This kits used are a Dragon FW190, Verlinden super detail set, barrels, Luftwaffe carts, Luftwaffe pilots and some airfield accessories. No I don’t work for Verlinden <grin> its just what I used. The FW-190 you can read about in a earlier review posted on this site so ill stick to the diorama information.
|
CONSTRUCTION |
 First thing I needed to get started is a
good strong wood base with routered edges, sufficient in size to accommodate all
the objects but small enough to fit in my display case. OK, I admit, I found
out that it fit the case after it was done, but you might want to think
about this in advance.
First thing I needed to get started is a
good strong wood base with routered edges, sufficient in size to accommodate all
the objects but small enough to fit in my display case. OK, I admit, I found
out that it fit the case after it was done, but you might want to think
about this in advance.
I wanted the background to have some definition so I built up the rear of the base with Styrofoam and carved it to the approx size and shape desired. The foam was glued down with white wood glue so I could move it around before it dried in place. Next step was to apply Polly Instafil to the foam and work it down over the whole base to give the groundwork a good foundation. Important point with this, the Poly works good but about 1 hour after application put on a rubber glove and smooth the fill with water and your finger to remove any unsightly ridges and make it more realistic, snow has a very smooth top surface if it is untouched and sandpaper scratches will look awful.
This whole process took most of a week because I could not decide on placement of the objects , since all items were previously assembled and sitting on my shelf awaiting a home I could move everything around a hundred times to get the right look I desired. I would strongly recommend this , remember the 6 P’s, Prior Planning Prevents Piss Poor Performance. Next step was to make the planks for the aircraft stand. These I made individually out of small wood trim, I cut every piece of wood to make the base as realistic as possible, this was no small task but I believe well worth the effort, you can buy pre made versions of this but they just wont work on a specific project like this.
 Once this was complete I spent another few
days working the planks into place with white glue, one plank at a time. Once
all the planks were dry I applied more poly around the edges of the planks to
simulate snow on the edge of the stand. Next I gave the base another thin coat
of poly and pressed in the tire tracks for the carts and many footprints. Once
dry, I coated the base in earth brown and gave is some varied raw umber washed
to get some texture and depth which I wanted to show through the snow.
Once this was complete I spent another few
days working the planks into place with white glue, one plank at a time. Once
all the planks were dry I applied more poly around the edges of the planks to
simulate snow on the edge of the stand. Next I gave the base another thin coat
of poly and pressed in the tire tracks for the carts and many footprints. Once
dry, I coated the base in earth brown and gave is some varied raw umber washed
to get some texture and depth which I wanted to show through the snow.
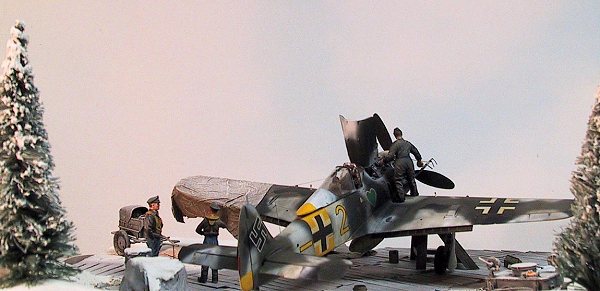
While the base dried I started work on the
trees, I found some pine trees from a train supply section and started to play.
Luckily it snowed heavily that night I my wife wondered why I was sitting in the
back yard looking out at trees when I should have been clearing the
driveway. LOL, she should know better by, a few days latter she said that my
model trees look exactly like our backyard. LOL. The trees actually
were very easy to accomplish, I just used thinned out poly on my finger and
brushed the trees in a downward motion until the poly stuck to the branches thus
looking like 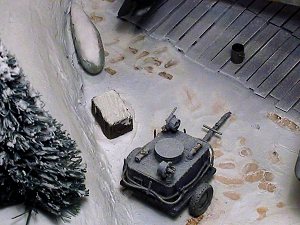 accumulated
snow. Once dry a very light dusting of flat white finished the effect.
accumulated
snow. Once dry a very light dusting of flat white finished the effect.
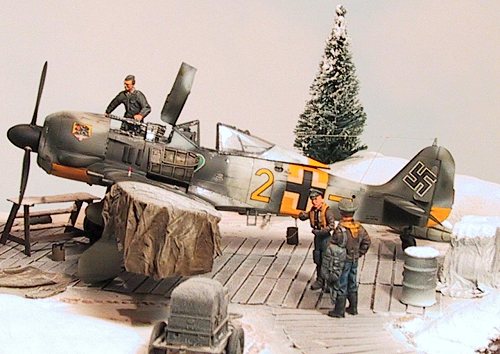
Continuing with the base I wanted not only to simulate track and footprints I thought that if dirt and mud simulating spring conditions would look better that just white dents in the snow. The whole base was painted flat white and given a coat of future floor wax to seal the base for weathering with oils. Basically all I did was give the white area a specific wash of raw umber in various shades and concentrated on the indentations in the snow. A black wash was put on the aircraft hardstand. Once this was dry a simple dry brushing of white on the snow and light brown on the base completed the effect nicely.
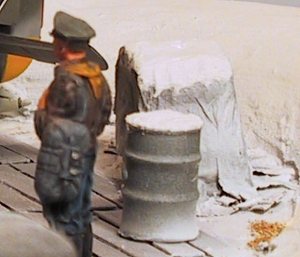 The stack of barrels in the background was
another experiment; I wanted to make a tarp that had recent snow accumulations.
The barrels were completed and a tissue placed over the barrels and wet down so
it would conform to the pull of gravity so to speak. Once this dried and look
realistic enough for my liking I added white glue to the water and sprayed the
whole area again, this when dry gave a permanent rigidity to the object. A
simple brush painting of olive drab and a kaki dry brush and it was ready for a
small amount of poly on the top to simulate the snow. Mission accomplished.
This technique was duplicated for the wing tarps on the aircraft and ground, the
snow effect was repeated on the spare drop tank and crates already completed.
The stack of barrels in the background was
another experiment; I wanted to make a tarp that had recent snow accumulations.
The barrels were completed and a tissue placed over the barrels and wet down so
it would conform to the pull of gravity so to speak. Once this dried and look
realistic enough for my liking I added white glue to the water and sprayed the
whole area again, this when dry gave a permanent rigidity to the object. A
simple brush painting of olive drab and a kaki dry brush and it was ready for a
small amount of poly on the top to simulate the snow. Mission accomplished.
This technique was duplicated for the wing tarps on the aircraft and ground, the
snow effect was repeated on the spare drop tank and crates already completed.
|
CONCLUSION |
The final step was to position all the objects into their pre determined spot and flat coat the base with Poly Flat. The whole process took over 4 months and I estimate 100 hours of enjoyable time in the hobby room. I hope I have shed a little light on how I completed this project and if you have any ideas please let me know. I am always looking for new ways to complete my projects.
Happy modeling
Ray