Building a Simple Base
Materials used:
Simple wooden base (I used an old contest award plaque, with the brass plate removed.)
Celluclay or papier mache
White glue
Fine dirt
Model RR groundcover
Acrylic craft paint
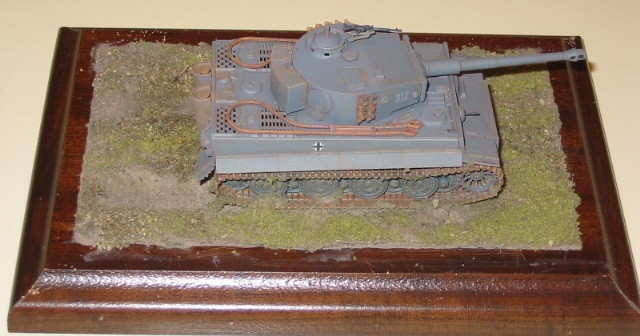
As part of my 1/72 scale Tiger I build, I wanted to try something new—building a simple base. I wanted to try weathering the model with some mud and dirt, without getting too carried away. I wasn’t looking to start a diorama—I had no story to tell, and I wasn’t ready to also try quality figure painting yet….
I was very pleased with how my first attempt at a simple, realistic base came out, and also surprised at how easy it was to create. So, here’s my simple “how to” article.
The first thing you should do is collect the necessary materials. Start with a base. You can buy one of a variety of small plaques at the arts and craft store, for a dollar or so. If you use one of these unfinished pine plaques, you’ll need to paint or seal the wood so that it doesn’t warp when you use the water-based products later on. Or, if you’re like me, you may have a ready supply of bases already—the assorted plaques collected from model contests.
You want to pick a plaque size that is appropriate to the model. Too small, and the model will overpower the base, leaving no room for any of the landscaping we’re going to be trying. Too large a base, and the scene will look incomplete- all the empty space around the model will make it look there should be something else there.
I used a standard model contest plaque for my base. I had a bunch of them just laying about- I’ll never miss a third place award from a contest two years ago. An advantage of using an award base is that it already has a finish. I pried the brass plate off the wood, and roughed up the surface a little so that the materials would bind to it well.
I bought a package of Celluclay at the local arts and crafts store for a few bucks. It is basically a white papier-mache product. It is mixed with water to make a paste that can be used for all sorts of projects. My arts and crafts store only carried it in white, but I understand it can be found in tan or grey, too. While I was at the store, I also bought a couple of small bottles of acrylic craft paint. I found one that was the perfect dried mud color. I also picked up a bottle of a darker brown, so I could offset the white of the Celluclay.
 You can buy
dirt-like material at the local model railroad shop, but you can find it
for free right outside your door. The trick is to get fine silt—you can
find it at nearly every curb and storm drain. I swept out my garage, and
found I had plenty of fine dirt right there. I simply filled a Ziplock bag
with the fine stuff, and now I have plenty for future projects.
You can buy
dirt-like material at the local model railroad shop, but you can find it
for free right outside your door. The trick is to get fine silt—you can
find it at nearly every curb and storm drain. I swept out my garage, and
found I had plenty of fine dirt right there. I simply filled a Ziplock bag
with the fine stuff, and now I have plenty for future projects.
The last item I bought was a small bag of groundcover from the scenery section of the local model railroad shop. (It looks like it is made form very tiny random pieces of foam, or foam shavings.) Stay away from the bright greens, unless your tank is crossing a golf course. My shop had a variety of colors to choose from—I ended up picking a muted olive green.
Not sure what I was about, I made a test base using an older kit, so I wouldn’t mess up my new Tiger before the upcoming contest. It turned out I needn’t have worried- the first one came out so nice, I immediately made a second one for my Tiger.
Basically, to get started, you simply make up a small bowl of goop, and spread it around on the wood base. You can go for a simple, irregular area, or you can mask off the part of the wood that you want to stay clear. I tried the irregular area on my first try, and masked off a rectangular area for the second. (I think I like the looks of the second one better.)
The mud (or goop) was made from some Celluclay, a little water, some craft paint, some of the fine sand, and some white glue. Mixing the white glue into the mix helps to ensure the material will stick to the wood when dry. You don’t need to make a lot of mud—if you spread it on too thick, it will take a long time to dry. I used a plastic spoon to mix and spread the mud. The proportions of the mix don’t matter very much- go with what looks good. Keep in mind that you don’t want it too wet or runny- a drier mix will hold it’s shape better, and dry faster.
Spread the mud around on the base. Aim to have the mud about ¼ to 1/8 inch deep. Now you have to decide where the model will go on the base. A couple of rules to keep in mind: (1) Don’t make the model square to the base- putting it at a slight angle will make it look less formal, and more “real”. (2) Don’t overhang the base- it makes the base look too small, and puts the model at risk of being bumped or dislodged.
Just plop the model down, and see if you like the location. If you don’t, pick it up and try another location. The mud will stay wet for hours, so you have plenty of time to decide. (Mine took over a day to fully dry.) Once you’ve decide where the model will go, use the model to create the tracks or rut that got it there. (You don’t want the model to look like it was parachuted into the field, it should have driven there!)
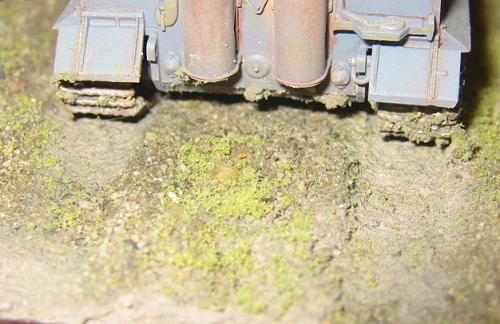
Sprinkle some fine sand over the base- it will give a slight variation in color between the top of land and the dirt churned up by the tracks. Don’t go for perfectly even coverage- you want variations in the terrain. Not all of the dirt will stick- you will shake the excess off later.
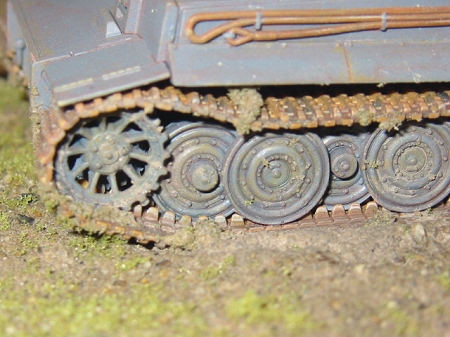 I added a small
amount of water to the bowl with the leftover mud, to make it a little
thinner. I then used a flat paint brush to apply the mud to the model’s
tracks and running gear. If you want, you can take the model off the base
to work the mud into the tracks if it is easier. Once that is done, put
the model back, and use the brush to blend the mud on the tracks into the
mud on the ground.
I added a small
amount of water to the bowl with the leftover mud, to make it a little
thinner. I then used a flat paint brush to apply the mud to the model’s
tracks and running gear. If you want, you can take the model off the base
to work the mud into the tracks if it is easier. Once that is done, put
the model back, and use the brush to blend the mud on the tracks into the
mud on the ground.
While the model looks OK on an all dirt base, it will look even more complete with some greenery. Mix a little white glue with some water, and apply it with a brush to the areas where you will be putting the green stuff. Sprinkle the green stuff over those areas- put it on thicker than you need- the loose stuff will shake off later. The areas chewed up by the tracks should not be devoid of grass- there should be some small clumps of green there, too. I’ve seen several diorama how-to articles that suggest letting the base material dry first, and then add the groundcover later. I did it all in one session, and saw no ill effects.
If you masked part of the base with tape, pull it up now. Pulling the tape up while the terrain is still wet will avoid any risk of chipping off bits or chunks of dried terrain.
As the mud dries, the model should be stuck to the base. If the model is not sticking, you can add a little white glue under the tracks. Some final touches—mix a little bit of mud with little clumps of greenery, and apply little dabs into the tracks. This will simulate the clumps of turf that get caught in between the individual track links. Now just set the base aside and let it dry.
My base took over 24 hours to dry. Once it was dry, I tipped the base over a trash can and tapped it to dislodge any loose material—only a little fell off. If necessary, you can use a damp cloth to clean up any stray mud from the sides of the base.
That’s all it took- I spent less than an hour on the whole process, including the practice base and then the one for my Tiger. I am very pleased with how it came out—I will definitely do it again.
April 2005