|
KIT: |
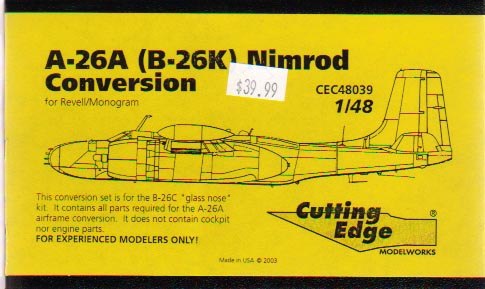
Cutting Edge 1/48 B-26K conversion |
|
KIT # |
CED 48039 |
|
PRICE: |
$39.99 |
|
DECALS: |
none |
|
REVIEWER: |
Steve Mesner |
|
NOTES: |
For Monogram/ProModeler kit |
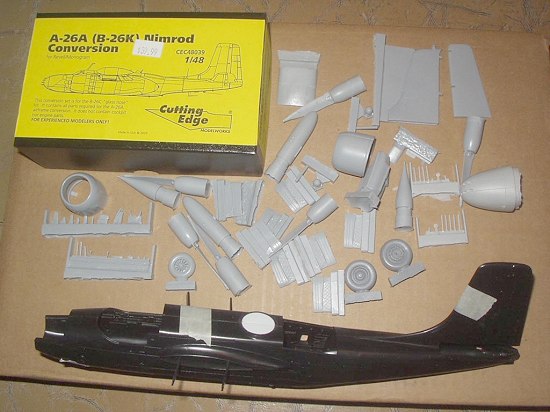
This
photo isn’t much for detail, but will serve to show the sheer volume of stuff
you get in the conversion set. Monogram B-26 fuselage not included, of course!
(Notice I have filled the turret hole on this fuselage with white sheet
styrene, as described in the text below.)
Let’s look at the pieces in more detail. The reason for this will become
apparent when we get to the “Snakenomics” section below.
Packaging and Initial Impressions
The set comes in a substantial and semi-elegant looking black box about the
size of seven packs of king-size cigarettes. And the box is nearly
full of Cutting Edge’s distinctive dense, pinhole-free gray resin! (I
counted three different shades of gray in my set.) FOR EXPERIENCED MODELERS
ONLY! the package warns, under the B-26K profile drawing that seems to be a
reversed image of a profile in the original Squadron A-26 Invader In Action
book. The set seems to be very complete for external modifications--maybe even
TOO complete, as we’ll discuss in “Snakenomics” below.
Instructions
Having been both guided, instructed, and occasionally amused by other Cutting
Edge instruction sheets, I found this one a bit of a letdown. It seems to have
less information on it than the sheet for their A-26B 8-gun nose (included in
this set), which is also sold separately. There’s no callouts for the various
parts (although the antenna designations are inscribed on their sprue), and
not much more than grainy photos of installed parts to show you where
everything goes. Most disappointing is that there’s no indication other than a
photo as to placement of the under wing pylons. Did I say you’ll need two
other extras before starting this conversion? Make that three: Add a good
reference book. The second Squadron A-26 Invader in Action (#134) has good
drawings of the under wing pylon locations, and Warbird Tech #22 has a good
diagram of the various antennas and where they go. (I know that the
instructions were the last thing CE did on this set before they went out the
door, so maybe they’ll find time soon to produce a more typical CE-like set of
instructions for it. Here’s hoping!) (Editor's Note: Steve has told me that
CE is redoing the instruction sheet. A new one will be sent by request to
those who have already bought the conversion.)
Cockpit and Engines
This’ll be quick: There aren’t any. B-26Ks all had a dual control cockpit,
which Meteor/CE has promised to tool up for us eventually. Let’s hope it’s
sooner rather than later so all you cockpit freaks can finish your builds. I’m
not a cockpit guy so I’ll be pressing on with the kit guts. (B-26K interiors,
including the bomb bay, were black.)
The B-26K should have the bolted-gearcase type R-2800 engines, which are not
included in the conversion set. Cutting Edge recommends Teknics engines, or
you can pirate some from the AMT F7F-3 Tigercat or a pair of Hasegawa
F4U-5/7/AU-1 Corsairs. Me, I’ll probably just use the kit engines and get on
with my life.
Cowlings
Whey they’re called “Congo cowlings” I have no idea, as all the pics of B-26Ks
in the Congo I could find showed aircraft without them. For that matter,
most of the A-26A/B-26K pics I looked at had the standard cowlings as
found in the Monogram kit; only a few of the Nimrods in Thailand seemed to
have the modified cowlings (no carb scoop) provided in the CE set. Check refs
for the airplane you want to build. Bottom line is that unless you
deliberately set out to build a bird with the Congo cowlings, you might well
discover that the one you want to do doesn’t need them. (More on this under
“Snakenomics” below.)
Props
Separate hubs and blades, which makes painting easy--nicely done! You can’t
just file the tips of the kit props square, as the B-26K blades are much
broader in chord. You need these parts, and they’re good.
Tip Tanks
They’re in two pieces each, are left and right handed, and are beautiful. No
more sacrificing a T-33 or A-37 kit to get these (not that those are
completely correct in the first place). They don’t fit over the wingtips; you
have to cut the tips off, but that’s a small enough sacrifice to make for the
conversion.
Weapons Pylons
These are just little gems! The detail is amazing, and they’ll save you hours
of work making them. As mentioned before, you’ll need the drawing in the
Squadron In Action book to show you exactly where they go.
Wheels
All three wheels are included, and the delicacy of the detail on the mains is
just breathtaking. They have flat spots on the bottoms, but are not
excessively bulged like some aftermarket resin wheels we could name.
Good stuff!
Fuselage Turret Filler Plug
Rather than just plug the turret hole, CE gives you the whole section of upper
fuselage the turret’s mounted in in resin. Good idea for the sake of
completeness, but not IMHO the best way to handle the problem. I just filled
that hole in the Invader I’m working on by laminating some sheet styrene,
cutting/filing two pieces of it to semicircle shapes, and welding them into
the fuselage halves with Ambroid Pro-Weld. It cost me nothing and took no more
time than will cutting and fitting for this piece will . But that wouldn’t
work in resin, because you couldn’t “weld” it in, and if it popped out while
you were sanding it after the fuselage halves were assembled, you’d be
screwed.
Fin
The K fin is exactly the same size and shape as the stock kit fin, but it has
a beacon on top and a row of vortex generators on the right side. Although
nicely molded, this piece doesn’t thrill me. I can make my own beacon, and I
can live without the tiny (almost unnoticeable) vortex generators. The thought
of cutting off the kit fin, and securely cementing and blending this one on,
frankly frightens me. Besides which, it’s solid resin, which means it’s gonna
be much heavier than the stock piece. I’ve already decided not to use this
piece when I build mine.
Rudder
The K rudder was lengthened (or widened, perhaps) six inches, which is 1/8
inch in scale. CE gives you a separate rudder with this modification
accurately made. At this writing, I’m not sure if I’ll use it (in conjunction
with the kit fin) or not. The bigger K rudder doesn’t really “jump out” at me
in pictures of the real thing. The Monogram kit already has a bit of a problem
looking too big in the rear end and too small in the front, and I might very
well decide to try to sneak by with the stock kit rudder as well. I’d almost
be willing to bet that no one would ever notice it.
Tail Cone
This piece is the main reason I’m considering staying with the kit rudder. The
longer rudder requires the longer tail cone to match it. Using the CE tail
cone requires cutting corresponding sections from not only the fuselage but
the kit’s one-piece stabilizer as well (CE’s instructions forgot to mention
that little detail). There’s gonna be a lot of work here, and many
chances to screw the whole project up, and all for what seems to me to be a
hardly noticeable change in the appearance of the finished model. And then
there’s the weight of all that resin on the extreme tail of the model! If I do
decide to use the CE rudder, I’ll have three choices about the tail cone: 1.
Do the several hours of work to use the CE cone, and make allowances for the
weight. 2. Try to build up the kit tail cone enough to get by with some kind
of putty. Or (simplest of all), 3. Display the rudder displaced to one side or
the other so that it’s not apparent that the rudder is longer than the
fuselage! (Feel free to steal that trick from me!)
Fiddly Bits--Antennas, Scoops, and Fairings
My, oh my, this set has ‘em! I counted 18 little antennas, scoops, and
fairings of one sort or another, and I’m not sure I didn’t miss some. I don’t
get too excited about this type of part, and in fact usually leave most of
them off, because I find that if I don’t lose them in construction, they
usually get knocked off eventually in handling, cleaning, or storage, but if
you’re the kind of guy who has to have every last antenna on your model, go
nuts! (Here again a good reference book will be invaluable for placement.)
8-Gun Nose
I’ve saved the worst for last. I’m sorry to have to report that the Cutting
Edge 8-gun nose isn’t right.
This isn’t CE’s fault; it’s Monogram’s. The A-26C kit fuselage (which the nose
has been made to fit) is incorrectly shaped. The Invader fuselage right ahead
of the windscreen should be straight and parallel to the fuselage
centerline until it gets to the nose joint panel line. Instead, Monogram has
it start sloping down immediately ahead of the windscreen. CE either had to
follow this line, or put a dog-leg kink in the upper line of the nose, and
they chose the former. The result is that the top line of the resin nose piece
has to slope down too far too quickly, making the whole nose piece look
noticeably (at least to me) undersized and a bit too “pointy.” CE has nicely
captured the upward curve of the underside of the nose, however.
I must confess to being a bit of a nut about this particular element. On some
airplanes, one or two particular features, shapes, lines, or “sit” can either
make or break the whole model (in my eyes at least), and on the gun-nosed
Invader, it’s the profile of the nose. I admit that this might well be as
subjective as it is objective, but the the CE nose shape just does
not look right to me, and I won’t be using it. When you get your set, take a
good look at the nose and see if it’s “close enough” for you. If you’re happy
with it, fine. But DO give it a good look.
By the way, the CE nose looks closer than any other aftermarket 8-gun nose
I’ve seen (not naming names here). And it looks better in person than it does
in the pic on Meteor’s website. But it still doesn’t look right to me. Here,
see for yourself the CE nose compared to the real thing:
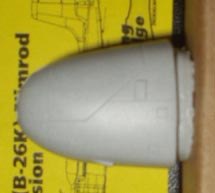 <<<<Cutting Edge 8-gun
nose. No, the picture is not upside down.
<<<<Cutting Edge 8-gun
nose. No, the picture is not upside down.
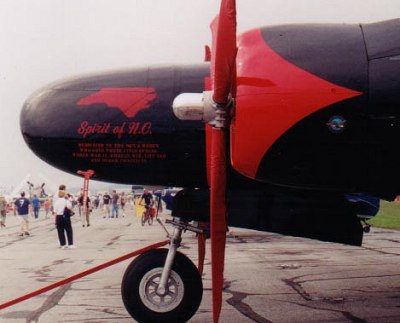 The real thing. Notice
that it’s blunter, rounder, and flatter on top than the CE part.>>>>
The real thing. Notice
that it’s blunter, rounder, and flatter on top than the CE part.>>>>
Now, I realize that the CE nose part will look fine to many of you, and you’ll
use the part with no problems. It doesn’t look right to me. If it doesn’t look
right to you, either, you have a couple of options:
1. Build a glass-nosed B-26K. This is what I’m gonna do. There are at least
three attractive schemes available for glass-nosed Ks (four, if you count
black nacelles with the glossy green-and-gray scheme as a separate scheme),
and I’m going to build mine as one of these. Note, however, that all the A-26A
Nimrods that went to Southeast Asia had the 8-gun noses, so if you want to
model a combat vet, you have to resolve the nose problem one way or the other.
2. Make your own nose. This is what I’m doing with the B-26B I’m currently
working on, even though it will require reshaping the fuselage ahead of the
windscreen. It’s the only way to get exactly the shape I want.
3. Start with the ProModeler A-26B version of the kit. I’ve never owned or
even examined this kit, but I’m given to understand that the nose contours
were reworked to better match the kit’s 6-gun nose, which seems to be pretty
close in shape to what it should be (judging from net pics I’ve seen of
others’ builds). Redrill the nose for the 8-gun arrangement (as far as I can
tell, the 6-gun and 8-gun noses had identical sheet metal contours), replace
the early type canopy with Squadron’s vac glass, fill the underside turret
mounting, and you’re ready to rock on.
One more thing here: CE recommends cutting the Monogram A/B-26C fuselage 3/16”
in front of the nose panel line for correct overall length and fit of the
conversion nose piece. My own measurements indicate that correct length is
reached by making this cut about .075 in front of that panel line. Experiment
to see what works for you, if you use the CE part.
Again, I’m not saying the CE 8-gun nose is junk. You’ll have to make that
decision for yourself after studying the part and your refs. But do do
this research so that you’ll be happy with the way your model looks after
you’ve put all that time and money into it.
Snakenomics
As self-proclaimed “Cheapest Scale Modeler on the Net,” cost of any given
project is always a concern to me--and I’ll bet it crosses your mind on
occasion, too. This conversion set sells for forty dollars. That’s not a lot
of money to some people, but it is to many of us. It’s twice what the basic
Monogram kit typically sells for on eBay or swap meets, and it means that
you’ll probably have $60--or even more--invested in building an accurate
B-26K/A-26A.
I’ll tell you right now that the CE set is worth every penny of $39.95. If you
figure your hobby time is worth only minimum wage, you couldn’t begin to do
this conversion on your own for $40 worth of time. And I’ll bet you couldn’t
do it as accurately, either--especially those gorgeous wheels.
I’ll also say that the CE set is cheap in relation to their other prices.
Compare the prices on some of their other parts and conversions with what’s
included in this set and you’ll quickly add up more than $40. The B-26K set
might very well be the biggest bargain in the whole Cutting Edge catalog!
All that notwithstanding, there are a lot of modelers who simply can’t or
won’t pay $40 for any conversion set, no matter how good it is or how much of
a bargain. I think Cutting Edge would be missing a bet by not trying to pick
up a few sales from those fellows as well. Therefore, I’d like to see them
offer a stripped “basic” B-26K/A-26A set for the budget-minded modeler, or
those less concerned with having every last detail just perfect, or those who
like to do some of the work themselves. Is it possible to get a set of
necessary, usable parts down to the $15-$20 price point? I think so.
First off, unless you’re emotionally attached to a particular airplane that
had the “Congo cowlings,” you can live without those. (All the Southeast Asia
A-26As were painted the same way and looked pretty much alike.) Deleting those
should knock close to $10 off the set price.
You do need the tip tanks, under wing pylons, props, and wheels for any
B-26K or A-26A, and those parts are all difficult to scratchbuild, so those
definitely go in the “keep” pile.
You can get along just fine without the upper turret filler, as I’ve described
above. That can go.
The 8-gun nose can go, too. Many of us won’t use it, and if needed it’s
already available separately in the CE catalog.
The antenna sprues would be nice to have, if they can be included and the
price kept down. If not, they can go too from our “basic” set.
That leaves the fin, rudder, and tail cone. For a real budget build, I could
get by without all three (as described above), but it might be nice to
have the rudder.
New instructions would have to be written for the “basic” set, telling how to
fill the turret hole with styrene and how to either display the rudder (if
included) offset or build up the tail cone with putty to match it.
So there you have our “basic” B-26K set for, let’s say, $19.99--tip tanks,
pylons, props, wheels, and maybe the antennas and/or rudder. I could build a
very presentable B-26K model with just those parts, and I’ll bet Cutting Edge
could sell quite a few sets of them to other guys, too--guys who won’t buy the
“full” set at $40. I do hope that CE will give the idea some consideration.
Thanks to Meteor Productions for the
reviewed sample. Thanks also to Jim Rotramel for additional information used
in this review.
If you would like your product reviewed fairly and quickly by a site that has well over 175,000 visitors a month, please contact me or see other details in the Note to Contributors.