This segment will be mostly the trains themselves, but
first, to fulfill a request, here are some images of the  station. The kit was
huge, and kit it was as the parts all had to be assembled. This includes cutting
out a ton of stickers for posters, signs and even the detail of the automated
ticket turnstiles where one enters the station. Had I been prescient enough, I'd
have also ordered figures to help populate it. Perhaps at some other time. The
kit also
station. The kit was
huge, and kit it was as the parts all had to be assembled. This includes cutting
out a ton of stickers for posters, signs and even the detail of the automated
ticket turnstiles where one enters the station. Had I been prescient enough, I'd
have also ordered figures to help populate it. Perhaps at some other time. The
kit also 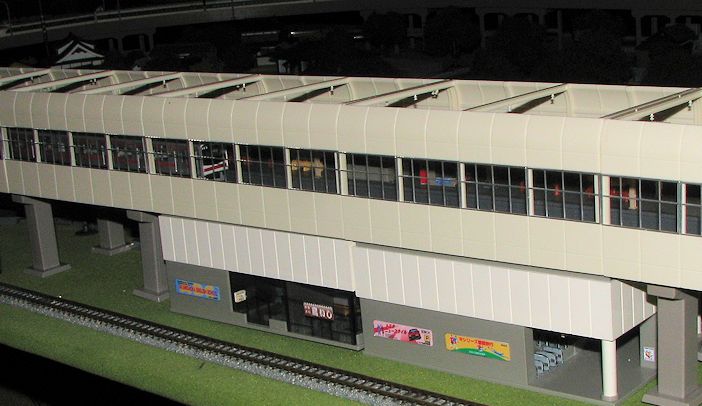 had the option of a fully enclosed side section, but I chose having the
windows in place so one could at least see the trains roll through. The second image is of the 'back'. You can see in the lower right of this image some of the ticket turnstiles, each with their little stickers on the side and top of each one.
had the option of a fully enclosed side section, but I chose having the
windows in place so one could at least see the trains roll through. The second image is of the 'back'. You can see in the lower right of this image some of the ticket turnstiles, each with their little stickers on the side and top of each one.
I'm of course, assuming that more than one or two
people are reading this and as much as I like to write about the subject, if it
is boring, I'll stop.
First thing to mention is American stuff. I kept a
nice number of locomotives and rolling stock from the 1980s, selling off mostly
items that were more modern and were large. When I planned on the door railway,
I knew I wouldn't be able to run my 4-8-8-4 Big Boy or other big locomotives and
rolling stock as they simply could not make the curves on such a small layout.
What I did keep were switchers and shorter cars with 40 foot cars being about
it.
Another thing I did was to replace the standard Rapido
couplers on these items with more prototypical looking ones from what was Kay-dee
and is now MicroTrains. There were two ways to approach this. One was to keep
the stock housing and just replace the coupler section. This is incredibly time
consuming taking me between 30-45 minutes per coupler as it is very difficult
for me to properly hold the bits to fit. However, it is also the least expensive
way to do things and I managed to convert a dozen or so cars and four
locomotives using this method. Unfortunately, the bulk of my locomotives had a
coupler housing design that would not allow these couplers to be installed.
The second method for rolling stock was to simply
replace the entire truck. This was more expensive, but a lot faster as one
simply removed the extant truck and replaced it with the new one from
MicroTrains. A few caused problems when the pin that holds them in place broke
instead of pulling out, but drilling these out fixed the situation. A plus with
the total replacement method is that the wheels are closer to the real ones (as
in shallower). The older wheels are deeper and will not run on what is known as
Code 55 rail, something that many who are REALLY into it will install. These are
the folks who use individual ties, separate rails and tiny spikes to hold them
down. Yes, AMS is alive and well in model railroading and these folks are even
more intense than any airplane or tank modeler I've ever known.
Anyway, with about 50-60 pieces of rolling stock
converted as well as four locomotives, I have something a bit different to run
even though they are not what you'd see in Japan. It is just something
different.
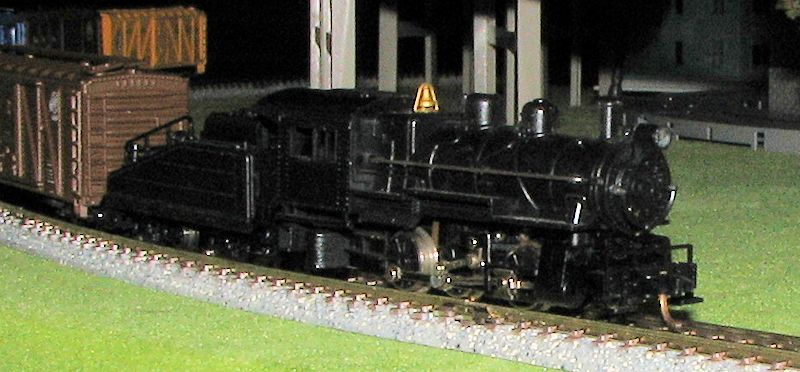
 For those wh
 o are
interested, I have two steam 0-6-0
switchers. One is a Santa Fe version from Bachman that I was only able to
convert the coupler on the back of the tender. The other is an unmarked Minitrix
version. Both are somewhat limited to the number of cars they can pull, which is
about 10 or so. The
o are
interested, I have two steam 0-6-0
switchers. One is a Santa Fe version from Bachman that I was only able to
convert the coupler on the back of the tender. The other is an unmarked Minitrix
version. Both are somewhat limited to the number of cars they can pull, which is
about 10 or so. The
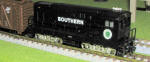 other two switchers are diesel. One is a Fairbanks-Morse
H
other two switchers are diesel. One is a Fairbanks-Morse
H -12 in Southern livery by Minitrix. The other is an Alco RS-3 by Atlas. These
two are more powerful and can easily pull 20 cars.
-12 in Southern livery by Minitrix. The other is an Alco RS-3 by Atlas. These
two are more powerful and can easily pull 20 cars.
But the emphasis of the layout is Japanese commuter
trains. Japan has cargo trains, but since the country has lots of ports, most
large goods move by ship and then by truck to their destination. Without the
hundreds of miles to cover from ports of entry, cargo trains are just not that
important, though they do exist and generally use passenger train lines.
Japanese trains can be divided into several categories. First are what we call
light rail or trams. Then there are subways, which are generally smaller than
the next section, which are commuter trains. This is followed by express trains
which travel longer distances between stops and are generally more comfortable
for longer trips. There are also special trains for excursions such as those
headed for Hokkaido in the winter for skiers. Then we have the high speed rail;
shinkansen or 'bullet' trains which travel up to 300 kph and travel a
considerable distance between stops.
So for my layout, I started with trains I had actually
ridden during my short tenure at Atsugi. Not as easy as it sounds as most trains
are modern versions of what I rode. The lines are the same, but not the rolling
stock. The first did not fit into this category as I bought a Kato two car tram
to run on my tram set. This train is not as smooth as I'd like. There are a few
sections of track where the tram stumbles a bit and efforts to improve
conduction have now worked out. One of them is the + crossing. Were this a
permanent layout, I'd solder the rails, but it isn't. As a result, I have to run
it at a speed that is higher than probably what the prototype runs.
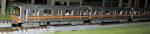 The first 'real' train was a
Ginza line subway produced
by Kato. This is a 01 series train that is part of the Tokyo Metro system. I
picked this one as I rode most of the subway lines in Tokyo during my stay and
the Ginza line was the first subway line in Japan. These trains are trimmed in
orange. Like all of the trains I've bought, I did a lot of on-line shopping,
picking up the least expensive one I could find. Fortunately, most train shops
in Japan that deal with overseas sales (and those that do not will not have an
English translated web site), it is pretty easy to find things on rather deep
discount. So far, everything I've bought has been at least 40% off Japanese retail. Some
of that savings goes away when one pays $30 or so for express shipping. However,
it is tons cheaper than buying on from a US shop. For instance, this set was $65
plus the $30 shipping. The cheapest I could find it from a US shop was $180 with
shipping.
The first 'real' train was a
Ginza line subway produced
by Kato. This is a 01 series train that is part of the Tokyo Metro system. I
picked this one as I rode most of the subway lines in Tokyo during my stay and
the Ginza line was the first subway line in Japan. These trains are trimmed in
orange. Like all of the trains I've bought, I did a lot of on-line shopping,
picking up the least expensive one I could find. Fortunately, most train shops
in Japan that deal with overseas sales (and those that do not will not have an
English translated web site), it is pretty easy to find things on rather deep
discount. So far, everything I've bought has been at least 40% off Japanese retail. Some
of that savings goes away when one pays $30 or so for express shipping. However,
it is tons cheaper than buying on from a US shop. For instance, this set was $65
plus the $30 shipping. The cheapest I could find it from a US shop was $180 with
shipping.
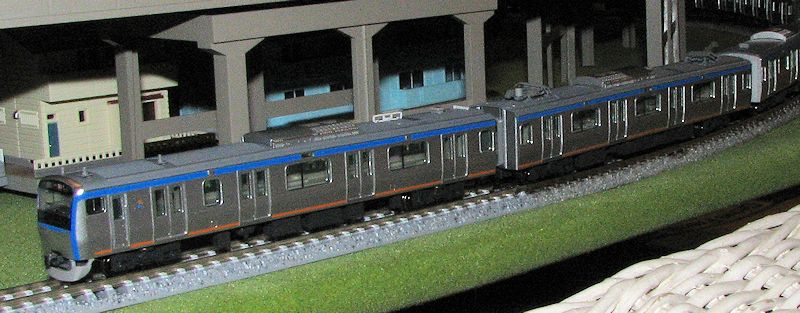
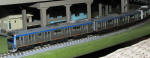 I had a second set of tracks in the elevated section
so started looking for more bargains. The next one was a 4 car set of a
Sotetsu
11000 series train running on the
Sagami Railway
line. This line is the one that I took from the base at Atsugi. The train is
by Tomix and a bit different from the Kato train. For one thing, one is expected
to put on the various destination and car number markings, which are supplied as
stickers. This is apparently pretty standard with commuter trains and so far
I've not done it. I also had to install the various antennas on the top of the
cars. This is also standard stuff. A few months after buying this set, I found a
six car add on set for it, also on deep discount so now I have a full 10 car
train. These trains are trimmed in blue.
I had a second set of tracks in the elevated section
so started looking for more bargains. The next one was a 4 car set of a
Sotetsu
11000 series train running on the
Sagami Railway
line. This line is the one that I took from the base at Atsugi. The train is
by Tomix and a bit different from the Kato train. For one thing, one is expected
to put on the various destination and car number markings, which are supplied as
stickers. This is apparently pretty standard with commuter trains and so far
I've not done it. I also had to install the various antennas on the top of the
cars. This is also standard stuff. A few months after buying this set, I found a
six car add on set for it, also on deep discount so now I have a full 10 car
train. These trains are trimmed in blue.
Next was the
Bullet Train.
When I was in Japan during the mid 1970s, there was only one line and one design
for the Shinkansen. Though the line ran just a mile outside of the base at
Atsugi, one had to go to Tokyo for the nearest place to catch the train. Wanting
to ride it, I bought a ticket to go a few hundred miles down the line and then
back again. It was a cool experience. Like riding an airplane on the ground.
Fortunately, Shinkansen trains are very popular and finding a nice 8 car train
wasn't an issue. Again, these can run up to 15 cars, but that would have been
too much as the cars for this train are longer than the norm. I picked the Kato
set for this one.
 Despite happily running these trains, one is rarely
satisfied and wants 'spares'. Again choosing from train lines on which I'd
ridden, I found another sale set. This time it was an 8 car train on the
Yokohama line. This set is trimmed in two shades of green. Again, this train
was by Kato and is a series
205-500.
Despite happily running these trains, one is rarely
satisfied and wants 'spares'. Again choosing from train lines on which I'd
ridden, I found another sale set. This time it was an 8 car train on the
Yokohama line. This set is trimmed in two shades of green. Again, this train
was by Kato and is a series
205-500.
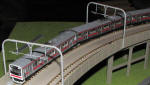 My newest train is one I've never ridden. This is from
the Keiyo
line and is the one that will take folks to Japan's
Disneyland. This is also a series 205 train and the reason I picked it up was
because it was a full ten cars (two sets) and it was less than half price.
Besides, it has nice red trim and looks nice. Like the Yokohama line set, this
one is made by Kato and while the same series, the look of the front of the
train is a bit different.
My newest train is one I've never ridden. This is from
the Keiyo
line and is the one that will take folks to Japan's
Disneyland. This is also a series 205 train and the reason I picked it up was
because it was a full ten cars (two sets) and it was less than half price.
Besides, it has nice red trim and looks nice. Like the Yokohama line set, this
one is made by Kato and while the same series, the look of the front of the
train is a bit different.
Back to Silver Rails index