
Last time, I had the track pretty well installed atop the various bits and pieces of foam, so had the elevation pretty well down. I had run on it for a while and was pretty sure that there would be no electrical connection problems. To be sure, I ran a set of jumpers from the power block to a spot about halfway around the track.
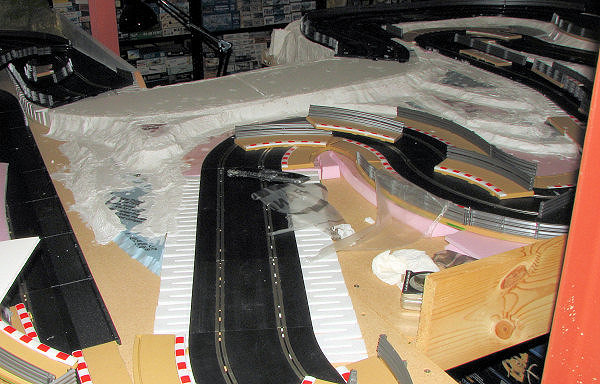
I then looked at the track and saw that there were some pretty impressive 'holes' that needed to be filled. Fortunately, I had lots of foam board so started using bits and pieces of it to create a more natural look to things. Well, as natural as I could. I hot glued in sections until it took on more of a terraced look. I also made sure that all the track borders I was going to use would fit or at least come close. I didn't have them all in place to be sure, but there was enough to give me a good idea. The initial downhill section has no borders on the right as there just isn't room for them. Not to worry about a car falling off there anyway.
 I then started adding the
plaster. I bought plaster impregnated cloth at the LHS and LTS (local hobby and
train shop). I found that they were both about the same and the cloth from
Woodland Scenics not only provided 25% more, but for less than an additional
dollar. This stuff is cut into sections, dipped into a bucket of water, allowed
to drip for a few seconds and then transferred to where ever you are going to
put it. For some earlier work, I'd used crumpled up newspaper, but that looked a
bit too 'amorphous' for my liking so started using scrap pieces of foam board.
This was a lot more 'jagged' looking and provided some edges the previous stuff
didn't have. You can see some of these sections in place in this first image if
you look at the blue stuff on the left center. For a smoother transition
on some of the 'steps' of foam board, I used my hot wire cutter to cut long
triangular sections. This worked quite well. The initial incline also had
foamcore board used to provide a flat surface. Works well, but is a tad noisy as
cars tend to 'boom' when going over it.
I then started adding the
plaster. I bought plaster impregnated cloth at the LHS and LTS (local hobby and
train shop). I found that they were both about the same and the cloth from
Woodland Scenics not only provided 25% more, but for less than an additional
dollar. This stuff is cut into sections, dipped into a bucket of water, allowed
to drip for a few seconds and then transferred to where ever you are going to
put it. For some earlier work, I'd used crumpled up newspaper, but that looked a
bit too 'amorphous' for my liking so started using scrap pieces of foam board.
This was a lot more 'jagged' looking and provided some edges the previous stuff
didn't have. You can see some of these sections in place in this first image if
you look at the blue stuff on the left center. For a smoother transition
on some of the 'steps' of foam board, I used my hot wire cutter to cut long
triangular sections. This worked quite well. The initial incline also had
foamcore board used to provide a flat surface. Works well, but is a tad noisy as
cars tend to 'boom' when going over it.
One has to be quick when using
this plaster as it starts to set rather rapidly. It also makes an incredible
mess so it is important to not only have the track either covered or removed,
but to put down something on the floor to catch the inevitable drips. I used old
towels. 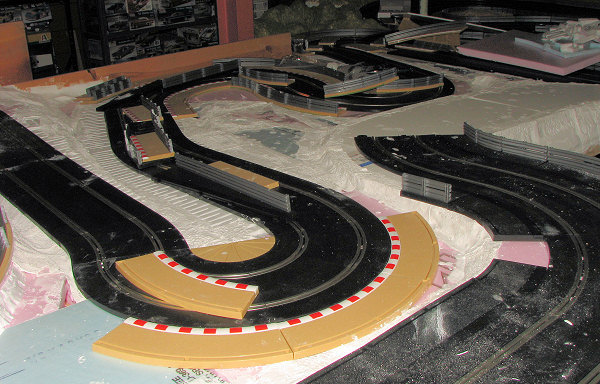
This next photo shows how the plaster cloth looks on the outside of the track as well. You can see this on the very far right. The initial downhill run is on the far left going into the first hair pin. I have set up the borders so I can see where to put the plaster cloth. You can see the 1 inch distance between the first downhill hairpin and the highest section of the track in the lower right foreground.
Next image (below) shows the
esses on the upper elevation flat. It also falls down a bit on the right, but on
the left, there is a rather sharp dropoff that goes down 4 inches to the table
level. This area was cut out some with the inner area filled with foam chunks
(like you see in the center of the track) and covered with plaster cloth. Here
you can also see some of the foam triangular transition bits I cut. It also
clearly shows the wall at the end of the esses that has been built up a bit and
how sharp the initial downhill turn is. It is easy to see from this angle that
there is no room for a border on one side of the downhill straight section.

This final photo for today (below), shows the downhill run from the initial hairpin into the next relatively sharp turn. Again, there is a considerable dropoff on the right that has already been covered with plaster, as have many of the stepped sections with alternating blue and pink board. The blue stuff is half inch and the pink is one inch in thickness. This was all hot glued down before the plaster was applied.
I generally piled a bunch of this stuff where I wanted it and started laying the plaster strips over the top of it. The process is rather fast when you get down to it and in no time, I had things looking pretty good.
One has to be quick as it starts to
set rather rapidly. It also makes an incredible mess so it is important to not
only have the track either covered or removed, but to put down something on the
floor to catch the inevitable drips. I used old towels for the floor, but left
much of the track in place, covering it with more towels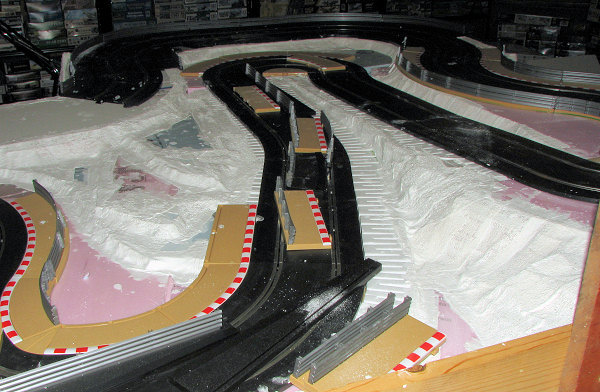 .
Didn't keep all the gunk off it, but what did fall on it was easy enough to
clean. The plaster tends to shed little bits of plaster dust when moving it
before it is wetted. A vacuum cleaner will remove this dust and keep it from
where it doesn't belong.
.
Didn't keep all the gunk off it, but what did fall on it was easy enough to
clean. The plaster tends to shed little bits of plaster dust when moving it
before it is wetted. A vacuum cleaner will remove this dust and keep it from
where it doesn't belong.
Of course, all this stuff pretty well kept me from running any cars during this juncture, but I felt that it was something that just had to be done. I know that many would be perfectly happy to run their track on the floor or on a table without any scenery, but I wanted this section to be something a bit different. The rest of the track was still on the flat and not 'sceniked', as the RR people refer to adding bushes and trees.
I'd like to thank those who sent in their slot car experiences and I'll make a note of sharing those with readers at a bit of a later date. Meanwhile, I'd like to keep hearing from you on the subject so please e-mail me at mmreaders@aol.com.
Scott
19 October 2007